
The Redback One Individual Protection Drill (IPD) was designed by Jason quite some time go.
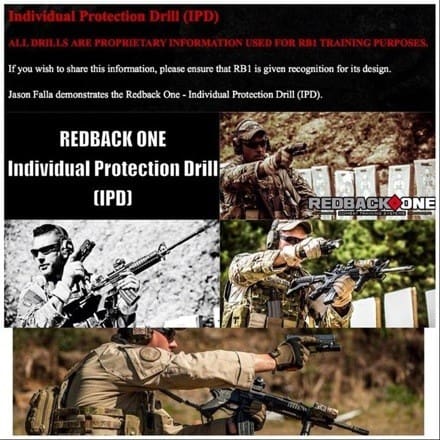
The IPD was designed to provide inherent protection to a singleton operating alone or when operating as a member of a tactical team. Also, according to RB1, the “IPD provides organic protection to the operator in order for the operator to determine the type of stoppage on the carbine and select the best course of action.”
Tags: Redback One
Unorthodox to a degree but I think its worth trying.
Same as “Check Drill” from M.I.S.S.
I’m not a fan. Seems like trying to do too many things at once. You’re in combat, your primary weapon fails, you switch to your secondary to eliminate the threat. Threat eliminated, you’re now holding both primary and secondary weapons, attempting to figure what’s wrong with your primary while still keeping an eye for threats. Sounds like a recipe for disaster is a stressful situation.
Slow is smooth, smooth is fast. Unless this drill goes PERFECT it could easily do a lot more harm than good.
You should take an RB1 course, maybe. It’s not as complex as it looks, and makes sense once you try it. Jason’s advanced classes are some of the best in the biz IMHO.
Seems like an effective niche tactic for when you are exposed and the enemy is engaging you to the effect that slapping,racking right away may be harmful, but when behind cover to the effect that you can have your sidearm out and your primary up would seem like time would be better served with all hands fixing the malfunction on your primary. I don’t think I have enough weapons time to train this, but maybe a very experienced operator could put this drill to use.
Nice name.
A TTP is just that. If it leaves the bad feller cold and bleeding and you go home then there is an amount of success there. Just don’t get to comfortable lest someone “steal your sword” or whatever Shrek said.
As TM said, you guys who don’t see the value in this should take an RB1 course.
All this technique does is maximize the time that you have an operable weapon out and ready to fire while you diagnose the stoppage and clear it. Hence the name “Individual Protection Drill”. Think of the steps involved with IPD vs. traditional methods.
Traditional:
Stoppage > Draw Secondary > Eliminate Threat > Scan/Assess > Holster Secondary > Diagnose Primary > Clear Primary
IPD:
Stoppage > Draw Secondary > Eliminate Threat > Scan/Assess > Diagnose Primary > Holster Secondary > Clear Primary
Probably the longest part of the actions above is diagnosing the down weapon system…especially if you mis-diagnose and don’t clear it on the first try. With the IPD, you get a nice “long” visual check of the down weapon system (thus giving you a better idea of what the stoppage is and how to clear it on the first try) WHILE having the secondary out and ready to provide fire. From Stoppage to Clearance, the IPD may even take a little longer as a process, but you also get a larger percentage of that time with your secondary out and ready to eliminate threats.
Hope that clears it up
Exactly, you’re reducing overall time while that you are out of the fight, Very smart technique.
Looks like a modified transition drill to me…. If the threat is inside 25 go to pistol, if the threat is outside 25 shooters choice, it’s my experience I can tap rack faster than going to pistol….Same shit different packaging.
It’s not about whether to go to secondary or not. It’s about covering your butt with an operable weapon system for a longer period of time while you diagnose the weapon system that is in-operable.
One more for the old tool box. Might not be what you need all the time-but if your in the open, alone, and a threat may be lurking, this might come in handy.
I think I figured out my problem with this drill (at least as shown in the video). When attempting to diagnose a problem with a primary weapon, he skips an important step, moving to cover. I understand a training environment has its limitations, but for a novice just watching, they might think that having your secondary out as shown is good enough and provides the cover and protection you need.
If you’re going to take your concentration off your area of security for even a nanosecond, you want to find cover if possible. It’s not even mentioned, and hence why I have an issue.
If you’re not going to train the way you would fight or skip steps during a drill because it’s just a drill, it’s a recipe for disaster.
As fox says, “if you’re out in the open”. The drill could use a little more description and clarification before posting online.
Don’t get too wrapped around what this drill is. This is an adaption to the way you fix a long gun malfunction in a team environment. Once you have secured a room after your malfunction the team searches the room and secures the entry points. You find a safe area to work, holster your pistol, and correct your malfunction. Then get back into the fight. What he has done was modify it to a lone person. Nothing wrong with the tactics, but probably not too useful in the real world, unless you carry your black rifle with you to Mickey D’s when it happens to get robbed by an assault team. Take it for what it’s worth.