
On 13 December 2021, instructions were made publicly available by TACOM on the PS Magazine website for M17 Rear Sight Installation. This is for maintainers.
END USER SOLDIERS ARE NOT AUTHORIZED TO PERFORM THIS PROCEDURE.
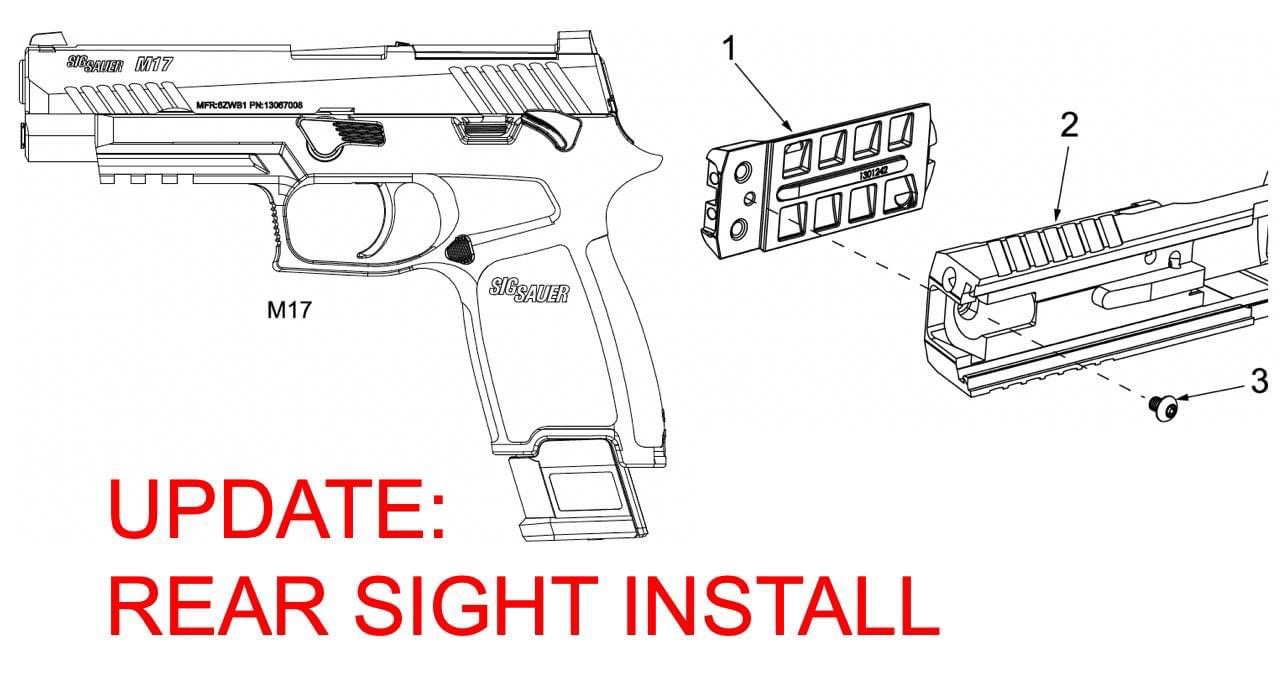
1. Insert the loaded chamber indicator spring and loaded chamber indicator into the slide.
2. Inspect the rear sight screw, NSN 1005-01-665-4524 (PN 13067025), to see if there’s a red Nylok® patch on the first 4 threads of the screw.
Note: Perform steps 3 and 4 for screws with a Nylok® patch.
3. Thoroughly clean the screw and rear sight threads to clear away excess Nylok® or Loctite®.
4. Apply one drop of Loctite 243, NSN 8030-01-620-3313, to the interior threads of the rear sight.
Note: Perform step 5 for one-piece rear sight installation.
5. Install the rear sight plate assembly onto the slide.
Note: Perform step 6 for two-piece rear sight installation.
6. Install the rear sight plate and rear sight onto the slide.
7. Install the screw into the rear sight. Tighten the screw to 21 in-lb.
8. Back the screw out until it is loose but not completely out.
9. Tighten the screw to 34 in-lb.
10. Check the rear sight plate and rear sight to ensure they are not loose. The use of sealing compound, Loctite 243, allows reuse of the rear sight screw. The rear sight screw will no longer be a mandatory replacement part (MRP).
PS Magazine article (no credentials required – open source):
www.psmagazine.army.mil/News/Article/2871712/m17m18-pistol-new-rear-sight-installation-instructions
TACOM Message (credentials required):
tulsa.tacom.army.mil/Maintenance
– SSG Ian Tashima, CA Asst State Marksmanship Coordinator
Please note: This applies to the mil M17, not the civilian P320/M17s which has two smaller screws. Using the torque spec indicated may result in damage if applied to the civ P320/M17.