
With your battle belt playing such a fundamental role in your kit, it’s important to get it right. From the choice of pouches and accessories, to placement, to the materials and pattern of the belt itself, your first line of equipment should be carefully crafted to fit your specific needs and use case.
Building a Battle Belt: The Belt Itself
The first decision is which belt to start with. Tactical belts break down into three major categories: Single, Padded, and Double.
Single belts are the simplest and usually the cheapest. They’re basically just a normal belt widened to spread the weight of your sidearm and magazines across a larger area and made from a more durable material, like ballistic Nylon. They’ll often have a reinforced buckle as well. A traditional single belt is a good option for those looking to save a few bucks, especially if you don’t plan on putting much gear on it or wearing it for extended periods of time.
Padded belts take a traditional tactical belt and augment it with a padded sleeve for improved comfort. The sleeve will usually have extensive MOLLE webbing on the outside, offering lots of real estate for mounting pouches, first aid kits, and accessories. These types of belts can be very comfortable, even when worn all day, but since they thread through the padded sleeve rather than your belt loops, they won’t do anything to keep your pants up.
The downside to padded belts is that they take up more space on your torso than single or double belt systems. They also can be more prone to shifting since they’re held in place solely by friction rather than being anchored to your belt loops.
Double belt systems are the current pinnacle of battle belt technology. There’s some variation within this category, but nearly all models use a low-profile inner belt that threads through your belt loops and an outer belt to which you attach your various accessories. The two belts are usually connected to each other with hook and loop fasteners to keep them firmly in place.
The double-belt design provides greater rigidity than a single or padded belt and will resist sagging better under heavy loads. The exterior belt is usually MOLLE-equipped, so like a padded belt, they offer greater space for mounting pouches and holsters. Since your gear is attached via webbing instead of threaded onto your belt, you don’t have to worry about it shifting around while taking the belt on and off.
Which design is best for you will depend heavily on your application.
Building a Battle Belt: Core Accessories
Regardless of which belt you choose, there are a couple of accessories that should be on any tactical belt.
Magazine Pouches
First and foremost is magazine pouches. As the saying goes, nobody ever walked away from a gunfight wishing they had less ammo.
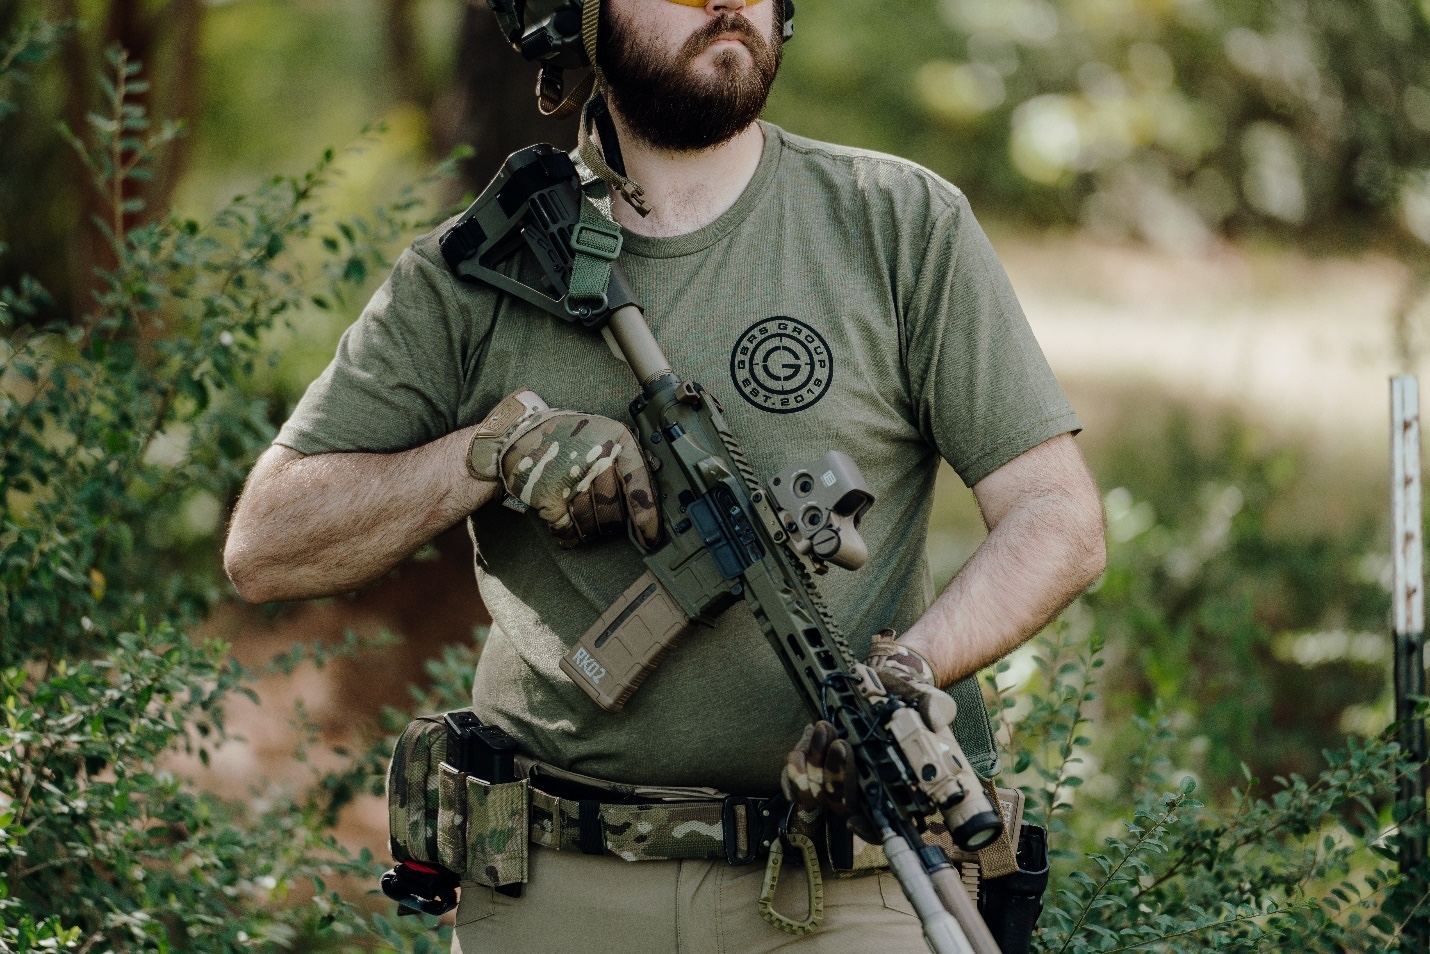
You’ll want at least one spare magazine for each firearm on your person, although more may be appropriate depending on your application and what other load-bearing equipment you’ll be using.
Most people prefer their mags at or behind the point of their hip, but handgun mags can be run forward of the hip as well. In that case, you’ll want to take a look at canted mag pouches to avoid compromising your ability to bend over.
Holster
Depending on your particular use case, a handgun may or may not be necessary for you, but if it is, then you’ll want a proper outside-the-waistband holster on your belt.
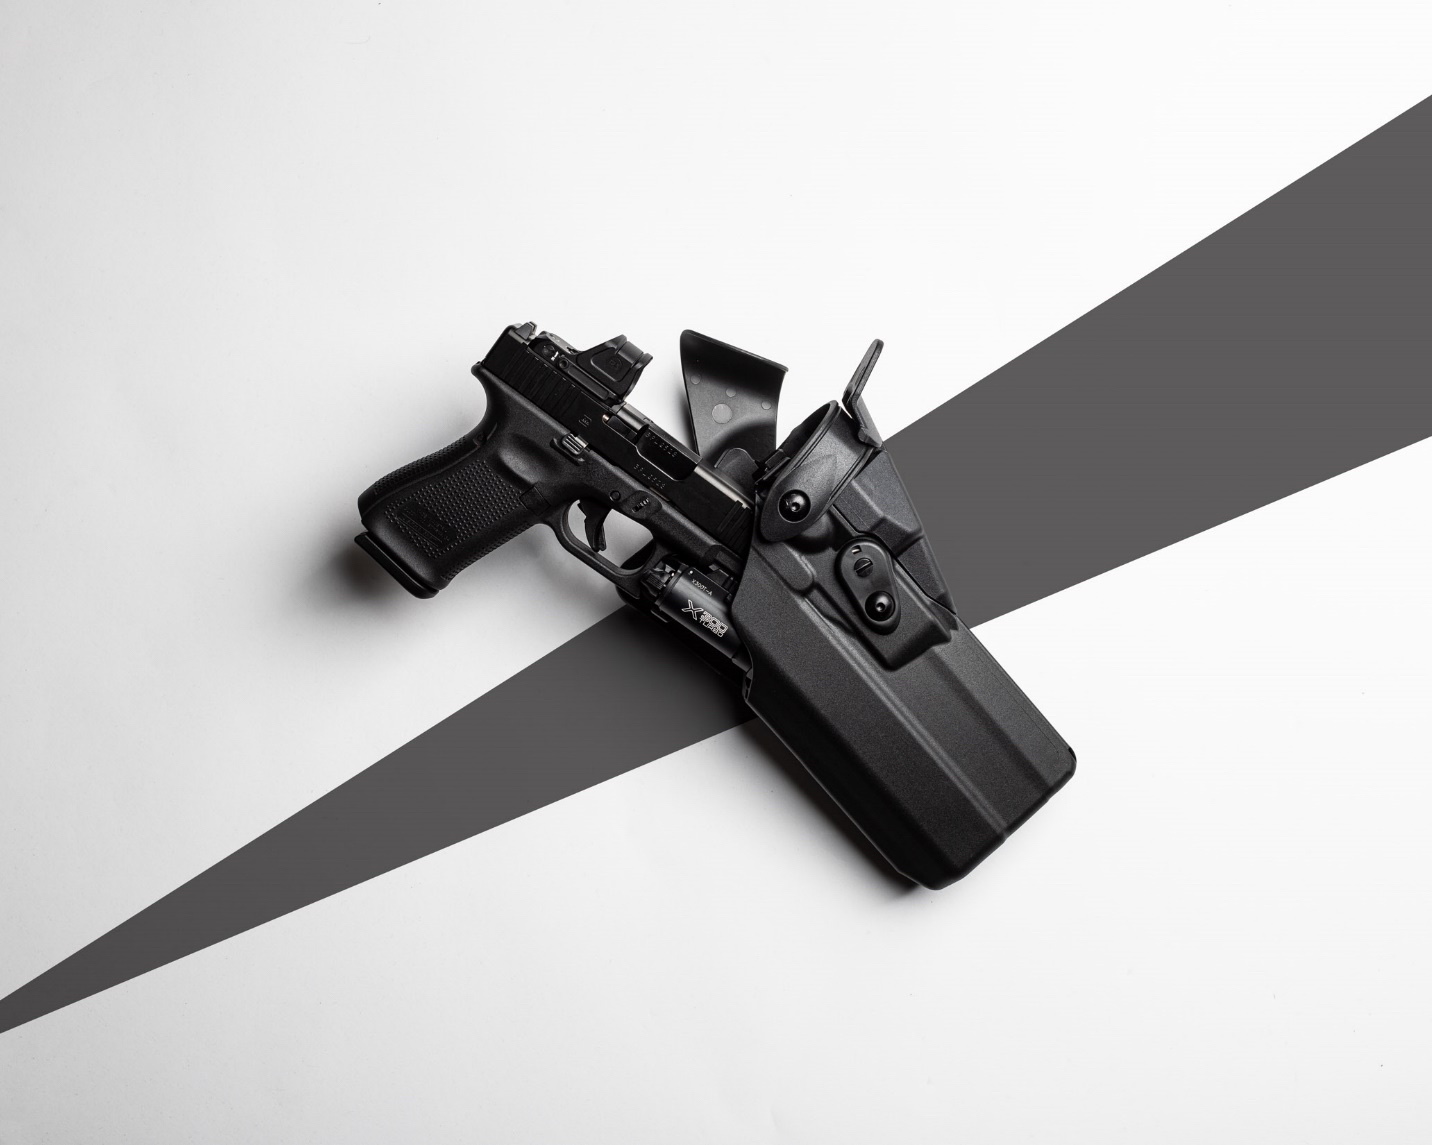
Obviously, a holster is best situated on your strong side. If you use your battle belt in conjunction with any form of body armor or chest rig, you may need a low-ride holster to provide enough clearance for a clean draw.
Regardless of your holster’s ride height, we heavily recommend something with active retention. Active retention such as Safariland’s ALS and SLS technologies or Blackhawk’s T-Series ensures that your gun stays in your holster until you draw it, no matter how much you get banged around.
First Aid
A battle belt is made for gunfighting, and gunfighting has an extremely high risk of injury, even if you prevail.
If used as a standalone platform, a battle belt should have at least a basic Individual First Aid Kit (IFAK) and a properly staged tourniquet. The “properly staged’ part is important; it should be positioned to allow rapid deployment and one-handed use, not still in the plastic wrap.
The best position on your belt for an IFAK is at 6 o’clock. This situates your IFAK directly behind you, making it accessible with either hand. It also takes up real estate in an area that’s not suitable for anything else.
Positioning a hard object on your belt at the small of your back increases the risk of spinal trauma if you fall on it; this is often one of the core criticisms of small-of-back concealed carry for firearms.
An IFAK usually contains enough soft material like gauze to eliminate this risk, meaning it’s probably the only thing on your belt you can safely carry in that position. This frees up other space for a dump pouch or more mags.
Building a Battle Belt: Secondary Gear
This category of gear is less universal, so you may not need all of it; in fact, you might not need any of it if your goal is a truly minimalist setup.
Flashlight
Even if you already have a weapon light, a standalone light is often worthwhile. Being able to illuminate an area without pointing a firearm at it is an important capability, especially for civilians.
As far as proper mounting location, flashlights are pretty versatile. Just make sure you can reach it with your non-dominant hand and that it doesn’t get in the way of more vital gear, like your mags or first aid kit.
If your belt is already pretty full, you can try mounting it horizontally on the front of the belt.
Knife
A quality knife really needs no explanation—you won’t find a more versatile tool. Whether it’s cutting rope or breaking glass, there’s really no substitute for a good, tough knife.
Some users like to keep a small knife for cutting tasks that require precision and a larger one for bigger jobs, but we’re of the opinion that one medium-sized knife is plenty for most people.
Small fixed-blade and folding knives can be mounted just about anywhere on a battle belt, but their most often situated on the dominant side of the belt, forward of the holster.
Larger knives are usually positioned on the dominant side as well, typically behind the holster. However, it’s very important to make sure that the knife and sheath don’t obstruct your draw.
Dump Pouch
They’re not a necessity, but having a dump pouch on your belt can be very convenient. They’re often used as a repository for empty magazines, as it’s much faster to dump them into the wide opening than to stuff them back into a mag pouch.
Beyond that, though, they’re also useful as a general-purpose dumping ground for anything you need to pick up and take with you but can’t fit into your pockets.
Dump pouches are low-priority pieces of gear when it comes to accessibility. You don’t need immediate, unimpeded access to them the way you do your holster or spare mags. For that reason, a dump pouch belongs wherever you have extra space that isn’t being occupied by more critical equipment.
Most users mount their dump pouch toward the rear of their belt, either behind their spare mags on their weak side or behind their holster and knife on their strong side.
Gloves
Many operators choose to wear gloves. Most guns get pretty hot after a couple of mag dumps, so a good pair of gloves can be a real asset in a prolonged confrontation.
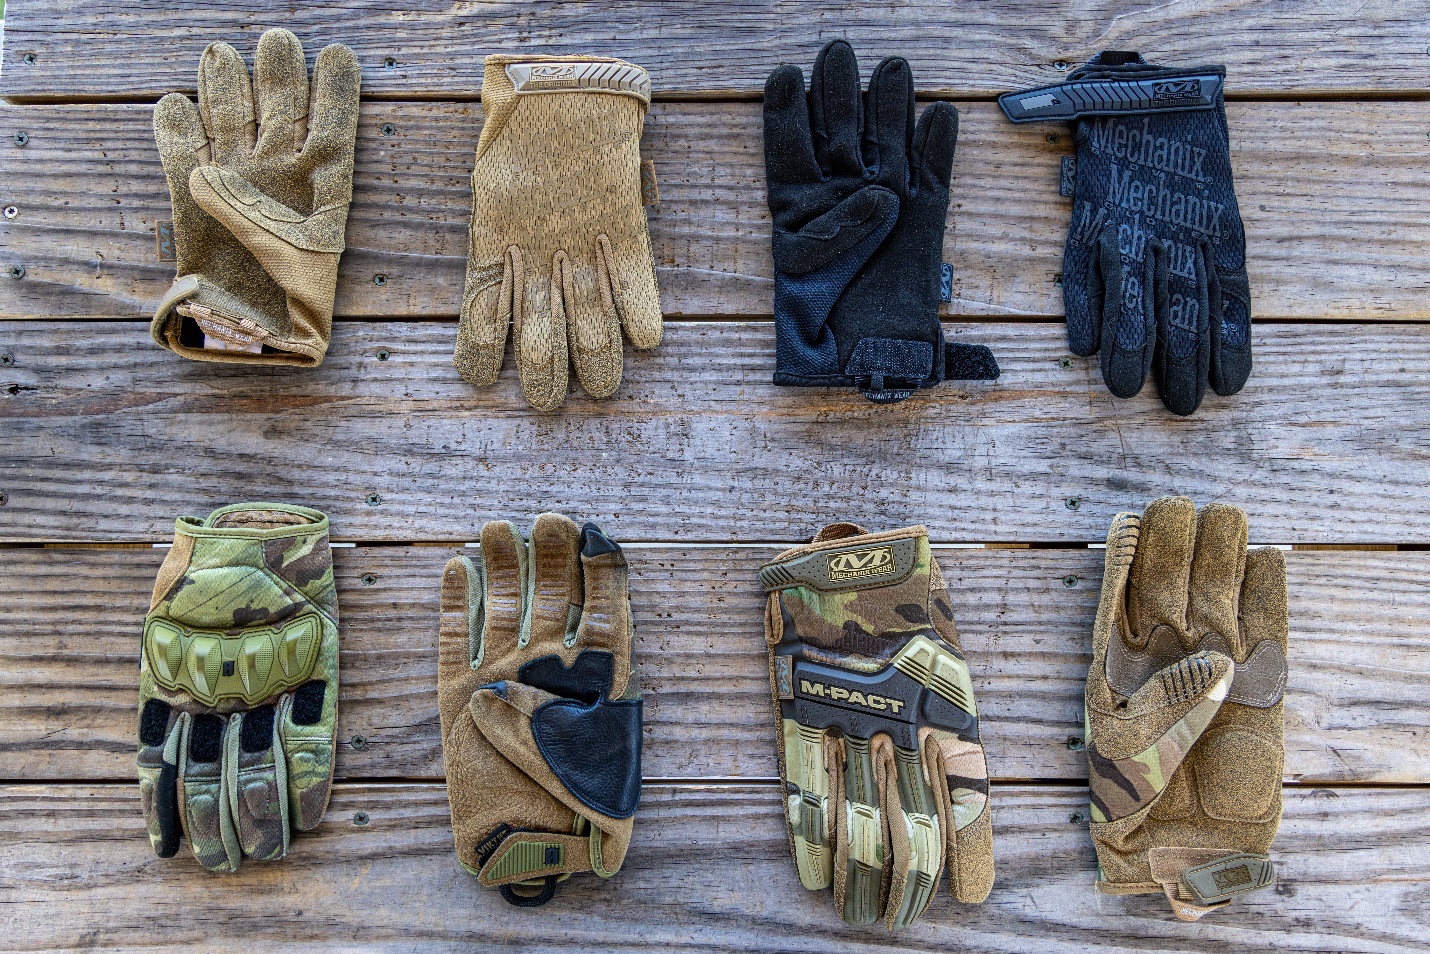
Most tactical gloves come with small loops sewn in at the cuff, making them easy to hang on a carabiner clip. Attaching them to your belt is a simple matter of threading a carabiner through a few loops of MOLLE webbing.
Many users choose to place this clip at the front of the belt, next to the buckle. It means your gloves will dangle in front of you when you’re not wearing them, but they’re lightweight enough that it shouldn’t matter.
Building a Battle Belt: Summary
Configuring a battle belt can entail a lot of trial and error. What works for everyone else may not work for your scenario or your needs.
It’s best to build up your battle belt one step at a time, starting with the essential elements like magazine pouches, medical equipment, and a holster, and train with it enough to figure out what works for you and what doesn’t.
Once you’ve got the essentials covered and the wrinkles ironed out, you can move on to less mission-critical equipment like flashlights and dump pouches.