
Packing a Wound with the JEMS Hot Product Award Winning OLAES® Hemostatic Bandage
An important part of learning to stop the bleed is learning how to properly pack a wound. Being prepared will help you be ready to save a life in the case of an unexpected emergency.
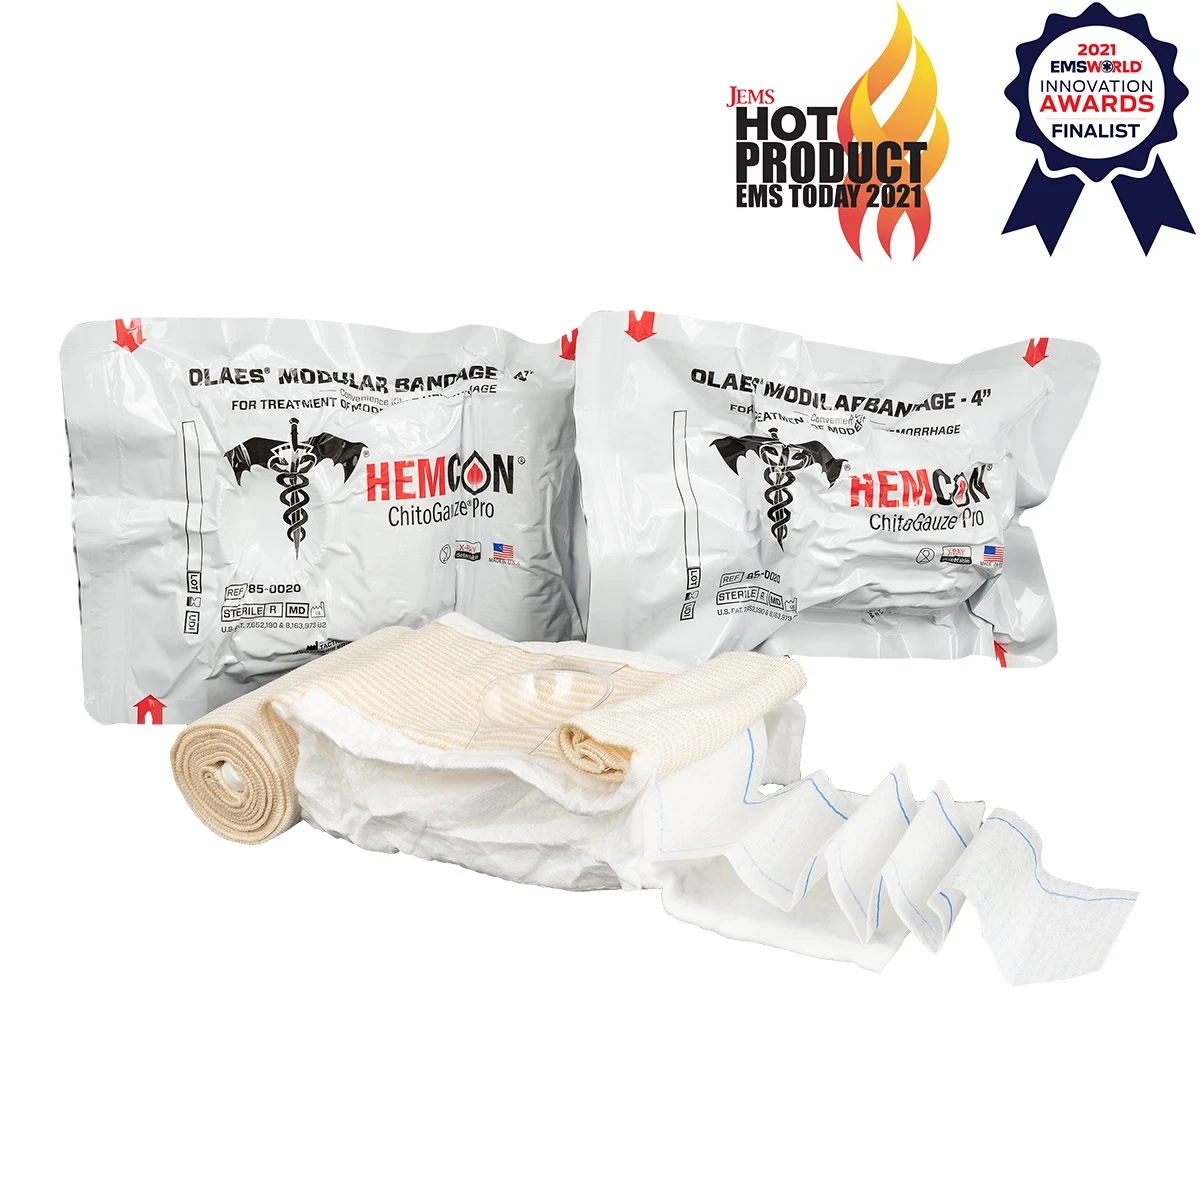
The OLAES® Hemostatic Bandage is a JEMS Hot Product of 2021 and an EMS World Innovation Award Finalist. It combines the globally recognized OLAES® Modular Bandage with battle tested HemCon® ChitoGauze® PRO to create the most comprehensive trauma bandage for multiple injury profiles. One of few CoTCCC recommended hemostatic dressings, ChitoGauze® PRO features chitosan as the hemostatic agent, is X-Ray detectable, and is located inside the bandage’s wound pad for rapid access at the point of injury.
Let’s look at the steps to packing a wound!
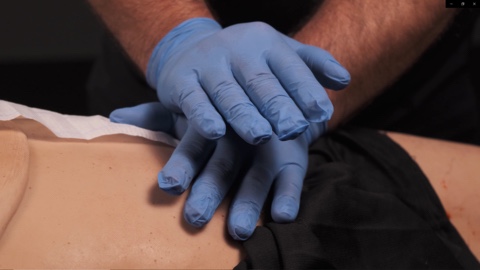
Step 1: Locate the Bleed
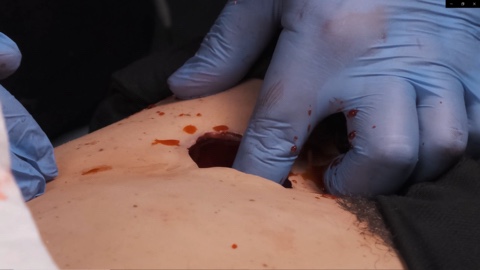
Put your fingers into the wound, locate the source of the bleeding, and apply direct pressure.
Step 2: Form a Ball
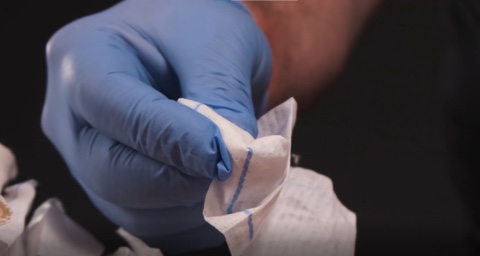
Take the end of the gauze and form it to create a ball of hemostatic agent to better provide direct pressure on the source of bleeding.
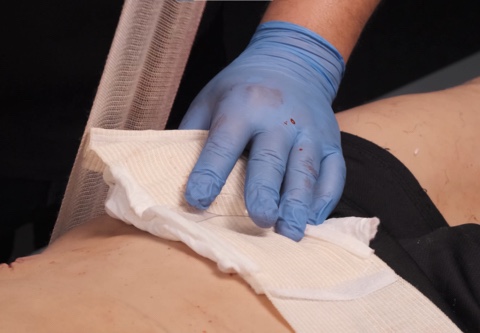
Step 3: Pack the Wound
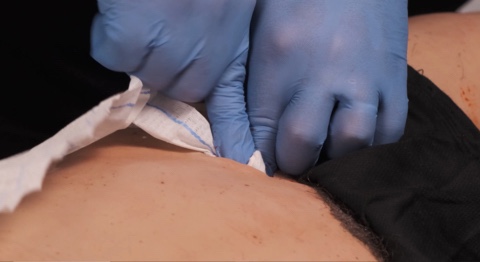
Using appropriate pressure to stop the flow of blood, push the gauze into the wound and directly onto the source of the bleeding. With constant pressure, pack the wound with the gauze until all the areas of the wound are completely filled and bleeding has stopped.
Step 4: Hold Consistent Pressure
Hold direct, consistent pressure on the packed wound for 3 minutes. If the bleeding stops, proceed to bandaging. If the bleeding continues, remove all the gauze from the wound and repeat all the steps with fresh gauze until the bleeding has stopped.
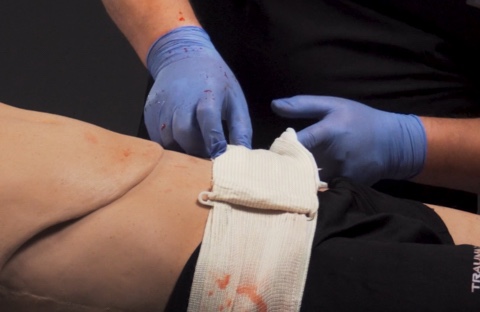
Step 5: Apply the Pressure Dressing
Once the bleeding has stopped, apply a pressure dressing with the pressure cup centered over the wound. Maintain pressure and wrap the bandage tightly over the wound and pressure cup.
Step 6: Secure the Pressure Dressing
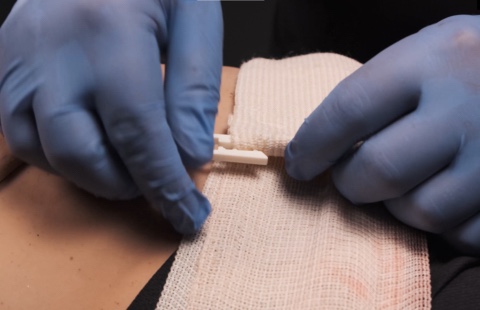
Once the bandage has been fully applied, secure it with the securing clips.
Step 7: Check Wound
Check to make sure that the bandage is in the right spot, the pressure is in the right spot, and the bleeding is controlled.
Step 8: Indicate Hemostatic Agent
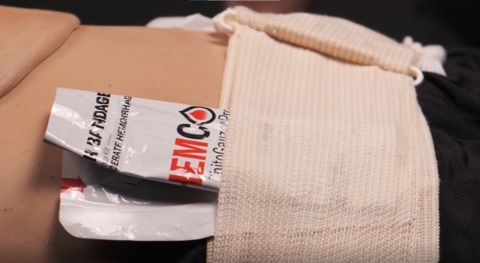
Annotate hemostatic use on patient’s DD1380 (Tactical Combat Casualty Care Card), and tuck the bandage’s wrapper into the dressing to indicate that a hemostatic agent was used.
Please seek additional medical attention and opt for hands-on training if possible.
For more information on the OLAES Hemostatic Bandage, check out this link: OLAES® Hemostatic Bandage – TacMed Solutions
Handy stuff, trainer already in their line with the standard OLAES.
Wow, dummies got pubes now. They are going ultra realistic.