FirstSpear

Archive for the ‘Maritime’ Category

SCUBAPRO Sunday – HYDROS PRO 

Sunday, September 30th, 2018

The HYDROS PRO is a true breakthrough in dive comfort and convenience. The moldable Monprene®, adjustable fit and multi-attachment points combine to make this the most customizable and comfortable BC ever. Winner of the 2016 Red Dot award for product design. Interchangeable straps, a packable design and an included backpack with room for your entire dive kit make the HYDROS PRO perfect for any destination and any dive.

Durable Monprene® construction means ultra durability. The HYDROS PRO also stands up to UV, chemicals, and abrasion — without showing typical signs of wear.  And a modular construction makes repairs — even from remote locations — a snap. It’s a BC for life.
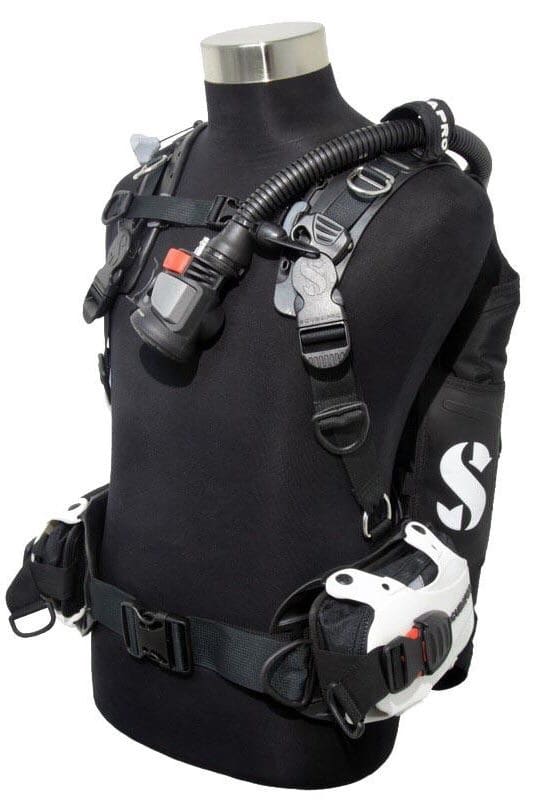
When you are wearing the HYDROS PRO, you won’t even know it’s there. The HYDROS PRO molds to your specific body shape, and has been designed with body grip gel, providing extreme comfort and stability. Near-Zero inherent buoyancy means less lead. And, thanks to a back inflation, smart air system you can dive in any position.

A 2-in-1 BC The HYDROS PRO includes both the Trav-Tek straps and a fully integrated weight system. So, with a quick switch of clips, you can transform the HYDROS PRO from a harness travel BC to an integrated weight BC. Now you only need one BC for both local diving and travel.
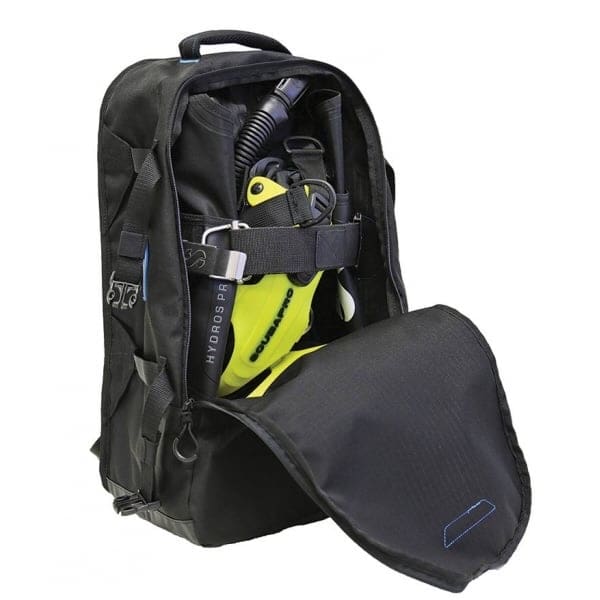
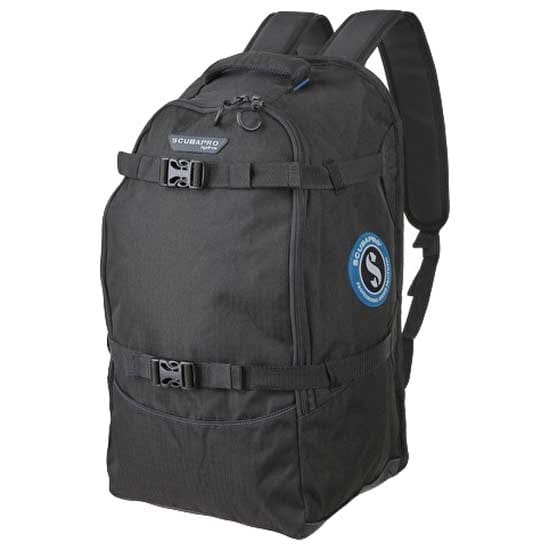
                   

Customize and Accessorize – Easily add, remove, or replace weight systems, bungees, D-rings, accessories and pockets to make the HYDROS PRO truly your own. With a wide range of mountable accessories and kits, your options are endless — and can quickly be changed based upon the dive and conditions.

Travel Friendly The HYDROS PRO goes everywhere with you. Instant dry, lightweight and compact, with a unique smart-pack design, the HYDROS PRO also comes with a customized backpack designed to fit your entire dive kit on your back.

The HYDROS PRO comes in seven colors, perfectly matched to SCUBAPRO suits, masks and Seawing Novas. Separate color kits are also available so you can change up your dive style whenever you want.

Specialized Fit for Women-Smaller air bladder. Shorter inflator hose. Curved shoulder straps that fit perfectly. Experience the difference of diving with a more thoughtfully designed BC for women.

Perfect For

• Instructors

• Tech Divers

• Travel Divers

• Female Divers

• Young Divers

• New Divers

• Dive Training

Ultra Durable: Patented Injection Molded Monprene® Gel Harness is extremely resistant to UV, chemicals and abrasion. The fabric-free harness uses no velcro or zippers.

Instant Dry: Ideal for travel due to less water retention and lower post-dive weight.

“BC-4-Life” Modular Design: Customizable to add/remove weight systems, straps and pouches. Extended lifespan due to simplified repairs. Virtually every component, including buckles, can be replaced without stitching.

3D Ergonomic Design: Conforms to your body shape for maximum comfort.

Lightweight: Advanced materials keep weight low.

Neutrally Buoyant: Near-Zero inherent buoyancy requires less lead, resulting in better buoyancy control and much more enjoyable diving.

Body Grip Gel: Prevents BC from shifting and riding up.

Dual-Compound Backplate: Provides the ultimate in stability and comfort. Single tank band system allows for easier assembly.

Torso Flex Zone: Auto-adjusts to your torso length for excellent comfort and freedom of movement.

Articulated Shoulder Straps: Allow straps to adjust to your body shape to achieve a snug fit.

Kit-Up Assist: Holds shoulder straps open for easy donning.

Cross-Flow Channel: Unrestricted internal airflow reduces air trapping for enhanced maneuverability and easy deflation at any angle.

2-Stage Inflation: Tri-bungee system controls air distribution to maintain a compact shape under water and high lift capacity at the surface.

Dorsal Weight-Wing: Anti-abrasion and instant dry. Optimal “Outboard” trim pockets.

Buckle Weight System: Simple, safe and reliable quick-release buckles offer a fixed location for easy one-hand operation.

Multi-Mount Accessory Matrix: Multiple D-Rings and mounting points for a knife + light + SMB + hoses + crotch strap and much more.

Smart-Pack Design: Folding shoulder and waist straps pack into the wing, creating an unbelievably compact package for easy transport and storage.

Available with Balanced Power Inflator or AIR2 alternate air source.
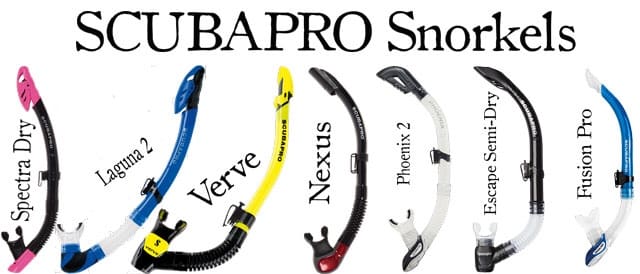
SCUBAPRO Sunday – Snorkels

Sunday, September 23rd, 2018

As far back as 3000 B.C.E, (5000 years) people were going after natural sponges off the coast of Crete and breathing through the world’s first snorkel tube that they made from hollow reeds. Aristotle, the Greek philosopher, recalled instances of divers breathing through a device similar to the trunk of an elephant.

In later years, the Assyrians developed an alternative snorkel device. They filled animal skins with air to breathe from when they were under water. Aristotle wrote about divers who used a tube that led from the surface to the divers below.  The consummate Renaissance Man, Leonardo Da Vinci had many designs that he called diving or underwater apparatuses. He designed a self-contained dive suit and even sketched diving gloves with webbed fingers. Technically, they could be considered the fist fins.

The development of the diving bell which contained air bubbles for divers to inhale while underwater was overseen by Alexander the Great.

• 900 B.C.E- Assyrian divers used animal skins filled with air in order to lengthen the time they could spend below the surface of the water.

• 333 B.C.E Alexander the Great encourages divers to develop and use the first diving bell — a large bell-shaped object that trapped air in the top of the bell (and a person) to submerge and maintain the ability to breathe.

• 1538- Greeks in Spain (Toledo) submerge themselves in large diving bell-like contraption to the bottom of the Tagus River only to emerge later with dry clothes and a still burning candle.

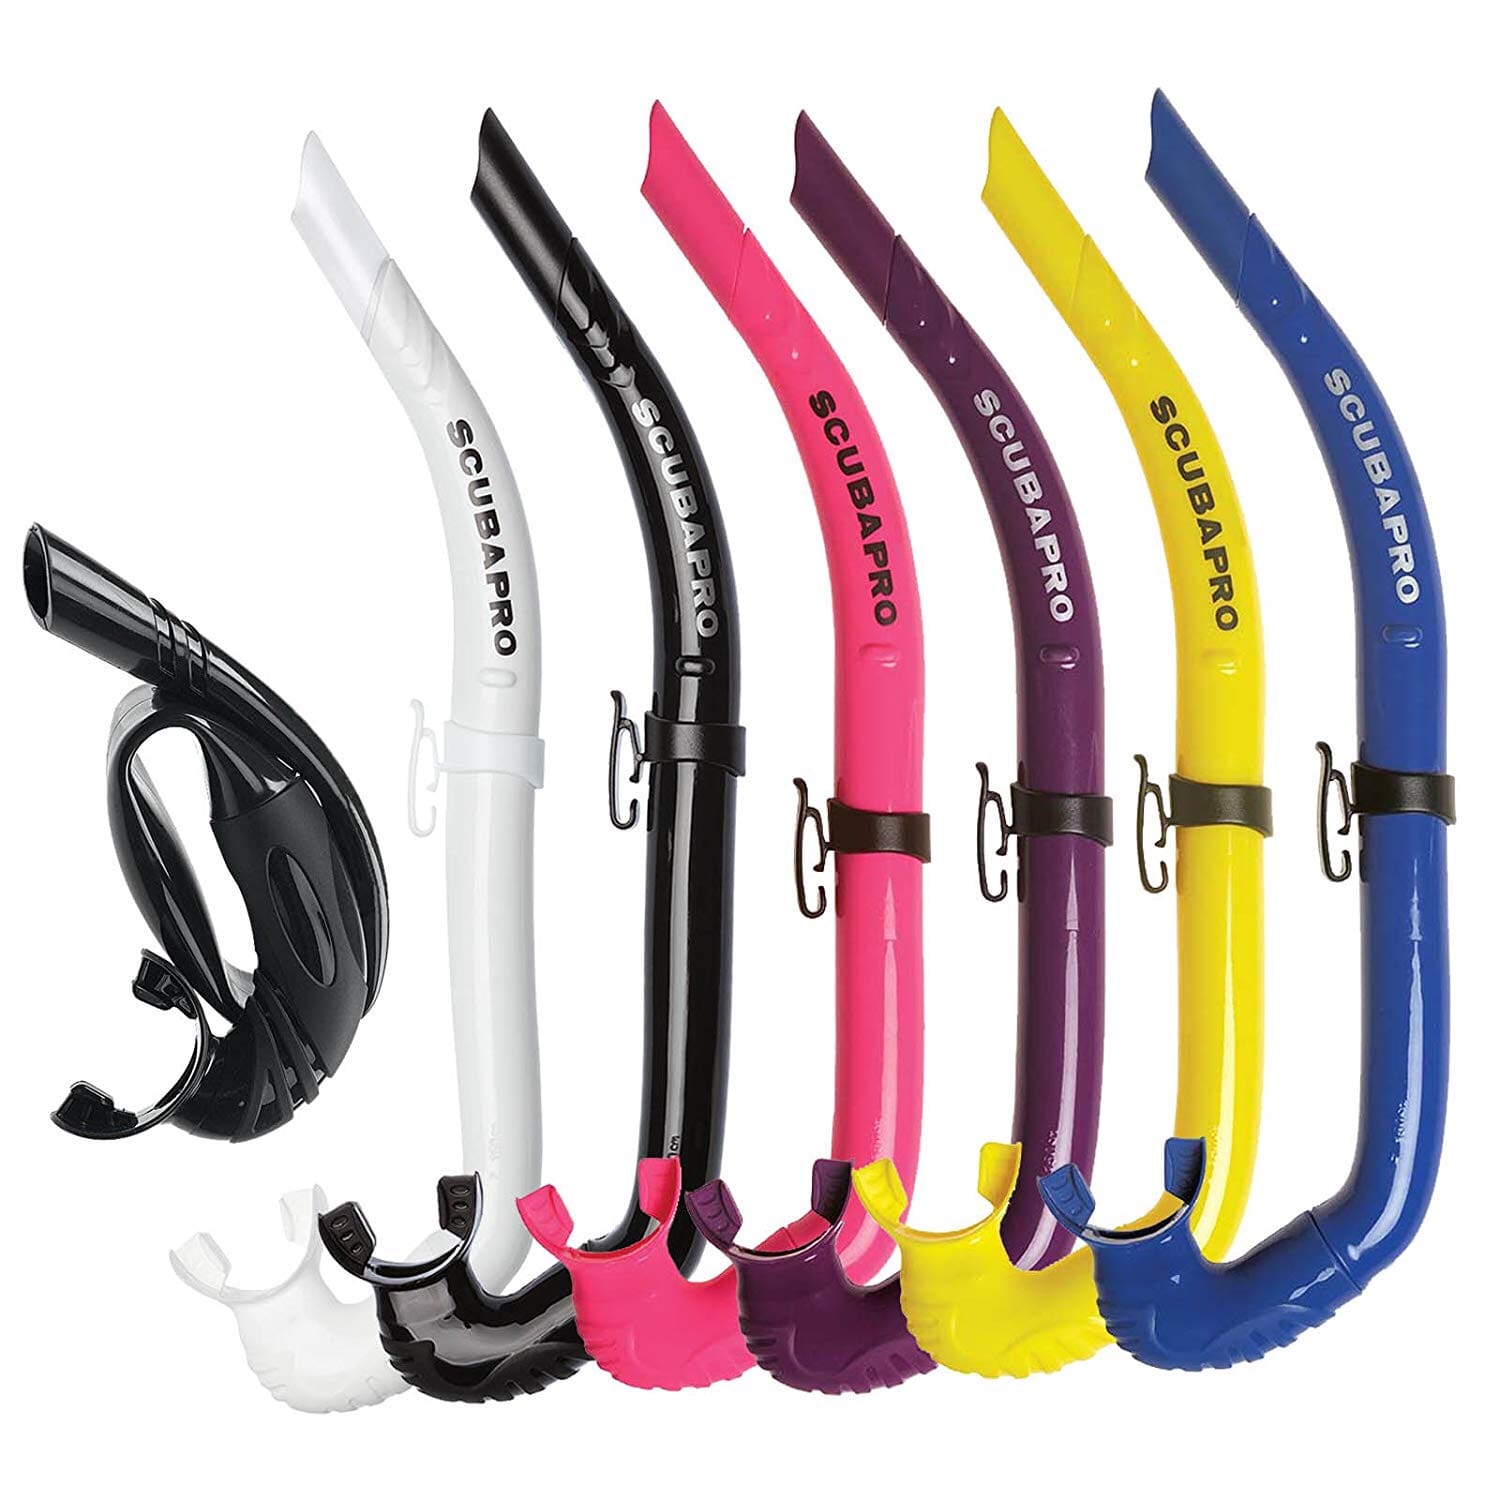
The same concept allows modern-day snorkelers to breathe air from the surface with their face submerged. Modern rubber and plastics make equipment durable and comfortable while offering maximum safety. With the advances in rubber and plastic composite materials, snorkels have significantly improved their function and use. The most popular snorkels is the J-shaped plastic tubes connected by a flexible strap or clip assembly to the diver’s mask.

Snorkels for diving

The snorkel makes it possible to breathe safely on the surface without using the air in your tanks. When choosing a snorkel, think first what you want to use it for and how you will use it the most. The diameter is important because it minimizes your effort while using it. Most snorkels are brightly colored so dive boats can easily spot them and more importantly you.

Free-diving Snorkels

Free-diving snorkels are often the simplest models. They are made without a complex purging system and without valves to limit breathing noise, those snorkels are also shorter to easily expel water from the tube and are easily tuck away. They usually have a slightly larger diameter to properly ventilate between two dive immersions. They are one of the best for Combat swimmer to use, as they are small and can be packed away easily and mostly come in dark colors.

Types of Snorkels

There are four common types of snorkels and each has their advantages and disadvantages.

Classic

The classic snorkel, also called a J-style snorkel, is a plastic tube with a mouthpiece attached. This snorkel is usually slightly bent, but it can also be made to fit a more specific shape. The SCUBAPRO Apnea snorkel can be rolled up and easily stored in a pocket or attached to the sides or bottom of a Rebreather. This is the one best suited for combat swimmer operations.

Flexible Snorkel

The flexible snorkel has a purge valve. This snorkel has a flexible portion and a rigid portion, as well as a one-way valve located at the bottom that makes it easier to expel any water that may get into the snorkel. The added flexibility allows divers to fit the snorkel better around their masks and faces. The purge valve at the bottom of the mouthpiece helps ensure uninterrupted breathing as it flushes water out every time you exhale.

Semi-Dry

The semi-dry snorkel is a mix of a classic and dry snorkel. The top features a splashguard, and sometimes even a flexible tube and a purge valve. The splashguard at the top helps to prevent splashes or sprays of water from easily entering the tube. It doesn’t prevent all the water from entering, especially if you fully submerge yourself underwater or if water covers the top like in a high wave.

Dry

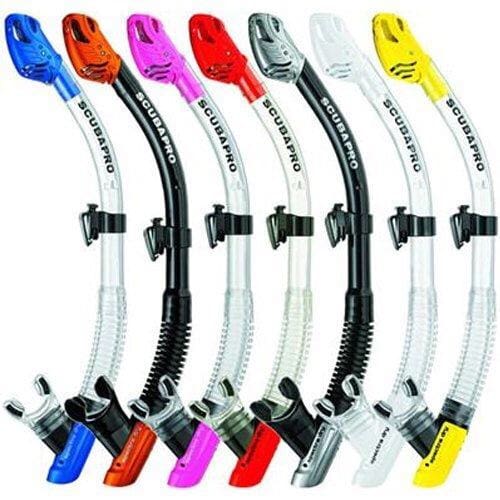
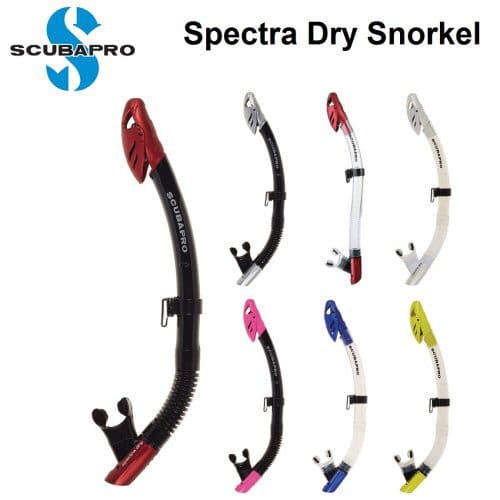
The dry snorkel has a valve at the top of the snorkel. The valve blocks water and air when the snorkel is submerged—and a purge valve at the bottom. They are great for snorkeling on the surface and occasionally dive without having to worry about constantly clearing water out of the tube. When used for diving, the advantage is that divers don’t have to clear them of water when they reach the surface.

As with semi-dry snorkels, the one-way purge valve at the bottom allows the user to easily flush water out with a few quick exhalations. While the dry snorkel is more convenient and efficient to use, it can also has its drawbacks. The valve at the top of the snorkel can sometimes become blocked. The dry snorkel may also be more buoyant underwater.

SCUBAPRO.com

SCUBAPRO Sunday – Drysuits

Sunday, September 16th, 2018

A drysuit is a significant investment and requires periodic servicing, but a well maintained, quality suit can last for years. Here are some tips to keep your drysuit at its best.

Cleaning Your Drysuit

Wash your drysuit after every use to remove skin oils and chemicals (like sunblock and insect repellent) from the gaskets. Clean inside with clean, fresh water, or SCUBAPRO disinfectant solution (P/N 41 050 034) to prevent bacterial development.

It is especially important to wash the suit after using it in salt water, as salt residues will degrade the latex.

To maximize the life of the gaskets, drysuits must be protected from sunlight and ozone. Never wash a drysuit in a washing machine or dry it in a clothes dryer. Any of these can severely damage the zippers and/or gaskets. If the suit is exposed to oil or grease, clean with a mild grease-cutting detergent and a soft brush. Rinse with clean, fresh water.


The inside and outside of a drysuit must be washed in separate steps. Wash the outside first, then turn it inside-out and wash the inside. Open all zippers and use a soft brush to remove any grit from the teeth.

Hang the Dry suit inside-out on a SCUBAPRO dry suit hanger (P/N 51 076 000) to dry indoors. Do not use a wire hanger, and don’t hang it outside where it will be exposed to sunlight. When the inside is completely dry, turn it right-side-out and allow the outside to air dry. Treat the latex gaskets with unscented talcum powder. Dust wrist and neck seals with talcum powder before pulling them over your hands and head. Talcum powder eliminates virtually all resistance between skin and seals, allowing them to slip on without stressing the rubber.

Apply zipper wax before zipping up the waterproof zipper. Use only the manufacturer’s wax that’s specifically formulated for your drysuit zipper. Apply the wax only on the outside of the teeth so as not to interfere with the zipper’s inner sealing surfaces.

If it’s a fabric suit, wipe down the outside with a microfiber towel and install the protective cap on the inlet valve to avoid corrosion building up inside the valve, which can cause a stuck inflator button. If it’s a neoprene suit, pat it down lightly, cap the valve, unzip and climb out.

Rinse off the inside. This is easier for drysuits with soft socks that can be turned inside out. Suits with attached boots can be difficult, but get them turned inside out as much as you can. Keep in mind that the insides of the boots are going to take longer to dry. You can add newspaper in there to help dry it. Make sure they are completely dry before putting the suit into storage.

Storing Your Drysuit

Store drysuits in a cool, dark place. Most clothes closets are fine but avoid attics and garages, any place that gets really hot.

Treat the gaskets with unscented talcum powder.

Hang the drysuit on a wide suit hanger. Because of their length, make sure the legs are off the floor, you can drape them over the shoulders of the suit if needed.

Zipper Care

Keep the zippers clean. Dirt and grit will make them difficult to operate and can even degrade their water tightness. When cleaning the suit, use a brush to remove dirt and grit from the zippers.

If metal zippers are stiff, rub them with beeswax or a block of paraffin wax. Do not wax plastic zippers.

Folding or over-bending can create a kink that will ruin the zipper. See the above video for tips on storing and packing your drysuit for travel, to learn how to avoid this type of damage.

Professional, commercial, rescue and military divers who may be forced to dive in contaminated conditions must identify the contaminant and take appropriate steps to remove the contaminant from the suit before it can be used again.

Storage & Transport

Dry suits are best stored on the SCUBAPRO dry suit hanger (P/N 51 076 000) that hangs the suit upside down by the feet with the zipper open. Keep in a cool dry place out of the sun. Keep copper away from the latex seals.

For longer-term storage, (make sure it is dry first) you can store it in a large Zip-Loc clothing storage bags and hang in your locker or closet

For travel, fold the suit loosely, avoiding over-bending or kinking the zippers, you can use round foam pool noodles to help with this. Then you can store it in a plastic box.

Bag

Each SCUBAPRO dry suit is supplied in a carrying bag. The flat design with perimeter zipper allows the bag to fold open for use as a dressing mat to keep your feet clean while getting in and out of the suit. Inside the bag is permanently attached pouches where the repair kit, zipper lubricant, and seal talc are conveniently stored.

Troubleshooting

Divers exposed to chemicals or contaminated water must take extra care cleansing & rinsing the suit after each exposure. Some chemicals can degrade or delaminate the suit materials to the point of failure

Leaks

Zipper

• Slider not closed all the way. Have your buddy check for full closure.

• Zip has failed – inspect for split in closed teeth.

• Zipper material failed – can either be punctured or damaged by abrasion.

• Foreign material caught in teeth – dirt, sand, debris, or the dry suit undergarment is frequently the trouble.

• The zipper is old, worn out, or damaged in some other way – have it replaced.

Valves

• Installation has loosened. Check back plate screw for tightness. Neoprene suits can see this, as the neoprene may continue to compress over time. Tighten if needed.

• The exhaust valve may be improperly adjusted, or there may be debris (sand, hair, etc.) under the seal.

• Valve parts may need servicing or replacement due to use and wear.

Seals

Seals leak for two reasons, damage or interference..

• Check the seals for holes or tears caused by sharp objects, wear & tear, or chemical damage.

• Check that there are no foreign objects such as hair, sections of undergarment.

• Check for over trimming. Make sure when you trim your seals you do it by putting a can or something round in the wrists or neck and trim around it. If you pinch the seals and cut them it will leave little “v” where you started and ended your cut and that will tear at some point.

• Check they adjusted properly and do not have folds that can create leaking channels, especially around the tendons in wrists.

Leak Testing Your Suit

Your dry suit can be tested for leaks by plugging the wrist and neck seals with objects of suitable size, closing the zipper and using the low-pressure inflation hose attached to the inflate valve to inflate the suit. Wrap an elastic band around the seal to help the plug stay in place under pressure. Start with the adjustable exhaust valve set at the lowest release pressure, and gradually increase until the suit is firm, but not hard. This way you will not stress the seals, fabric or seams of the suit. Once the suit is inflated, submerge it a section at a time in the bathtub, and inspect for leaks. Small bubbles will appear if a leak is present. Alternately, lay the inflated suit down outside, and slowly pour warm soapy water over the suspected areas. The soap solution will blow small bubbles, or create fine foam over the leak.

Once the leaks are located, mark the area, rinse and dry the suit thoroughly, and follow the repair kit instructions.

A dry suit is a complex piece of equipment designed to keep a diver comfortable in extreme conditions. Treat your drysuit as a piece of life support equipment, maintain it properly, and inspect it for wear and damage before and after each dive.

Revision Awarded Contract By US Coast Guard To Deliver Custom Bump Helmet Systems

Monday, September 10th, 2018

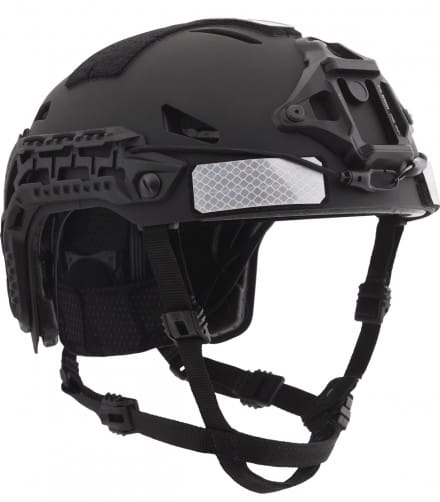
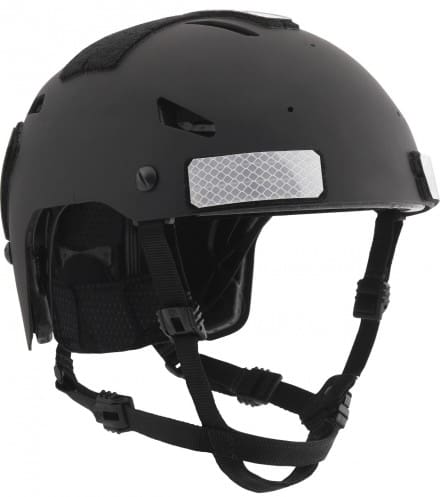
Essex Junction, Vermont (September 10, 2018) – Revision Military, a world leader in military head systems and helmet solutions, has won a helmet contract with the U.S. Coast Guard (contract ID: 70Z02318DMNQ07400). Revision was competitively selected against other solutions and will deliver a custom helmet system inspired by the company’s Batlskin Caiman™ Bump Helmet System. The helmet system is built on a skeletonized, lightweight base that is ideal for affixing headborne equipment and is specifically designed for the turbulence and physicality of maritime and mobile maneuvers experienced by boat crew Coast Guardsmen.

97700442-689A-4788-B027-96589B20AC88

“Revision’s proven strength is delivering tailored solutions built to the precise and unique demands of its customers,” said Jonathan Blanshay, CEO, Revision Military. “We are proud to continue this commitment through our development of the custom solution selected by the U.S. Coast Guard. Revision worked directly with users to tailor this helmet system to the challenges consistently faced by Coast Guard boat crews. This helmet system is particularly notable because it is based on some of the most exciting protective head systems developments Revision has made in in recent years. Leveraging the unique versatility and scalability of our Caiman Bump system, and the ultra-comfortable APEX Liner System developed for the Caiman suite, Revision is set to deliver a reliable protection solution that meaningfully enhances operational effectiveness for these dynamic users.”

2CAEE41C-D963-42D0-B2F3-7C5828E03A08

The contract with the U.S. Coast Guard stipulates a 12-month base period, with four 12-month option periods, over which time Revision will deliver these custom helmet systems. Like this tailored Coast Guard boat crew system, Revision’s Caiman Bump Helmet consists of a reinforced polymer shell that places a premium on scalability and integration for maritime and mobile operations while providing blunt impact protection that meets U.S. Army ACH standards. The Caiman Bump system also features improved ventilation, five-size comfort fit, and comms system-ready geometry. The Batlskin Caiman Bump System is available as a global solution for other Coast Guards and Naval Boarding Parties seeking a unique combination of integration, scalability, performance, and protection.

SCUBAPRO Sunday- The G2 Dive Computer

Sunday, September 9th, 2018

SCUBAPRO’s G2 Dive Computer considers heart rate, skin temperature, breathing rate (workload) and water temperature when calculating diving profiles. Its Advanced Uwatec algorithm programs up to 8 nitrox/trimix mixes to handle any recreational or technical diving scenario.

The F2 uses color (user selectable) to help rapidly convey information. The G2 also offers up to 50 hours of dive time per charge abd includes a Includes half-compass rose and bearing memory.

www.scubapro.com

SCUBAPRO Sunday – History of Combat Divers/Swimmers in the US

Sunday, September 2nd, 2018

The first mention of combat swimmers appears in the chronicles of the Greek historian Herodotus ca 450BC. The Persian king Xerxes used divers to retrieve goods off of sunken ships. They were also used for ship repair and reconnaissance of harbors and channels.

Almost every Navy throughout history has had some form of combat swimmers. They have been used to smuggle goods in during the siege of Syracuse during the Peloponnesian war. The Spartans and Athenians were one of the first to employ combat swimmers, but history usually credits Alexander the Great in his famous siege of Tyre (Lebanon) in 332 B.C. He used “demolition divers” to remove obstacles from the harbor. Aristotle reported that Alexander himself made several dives in a crude diving bell to observe the work in progress. They were also used to cut the anchor lines of Roman ships by the Byzantines in 320 BC. The Byzantines replaced the lines with their own and pulled the Roman boats into the harbor ending a 3-year siege. The Romans then replaced all their anchor line with steel chains.

The U.S. started using Combat swimmer at the birth of our country. They were used during the revolutionary war to set fires and sink British ships. They were also used in the Civil war by both sides for sabotages and scouting. The U.S. didn’t really use combat swimmers again until WW2. Although some Americans did service with specified dive units of our allies in WW1. Those men would go on to help set up the units we used in WW2.

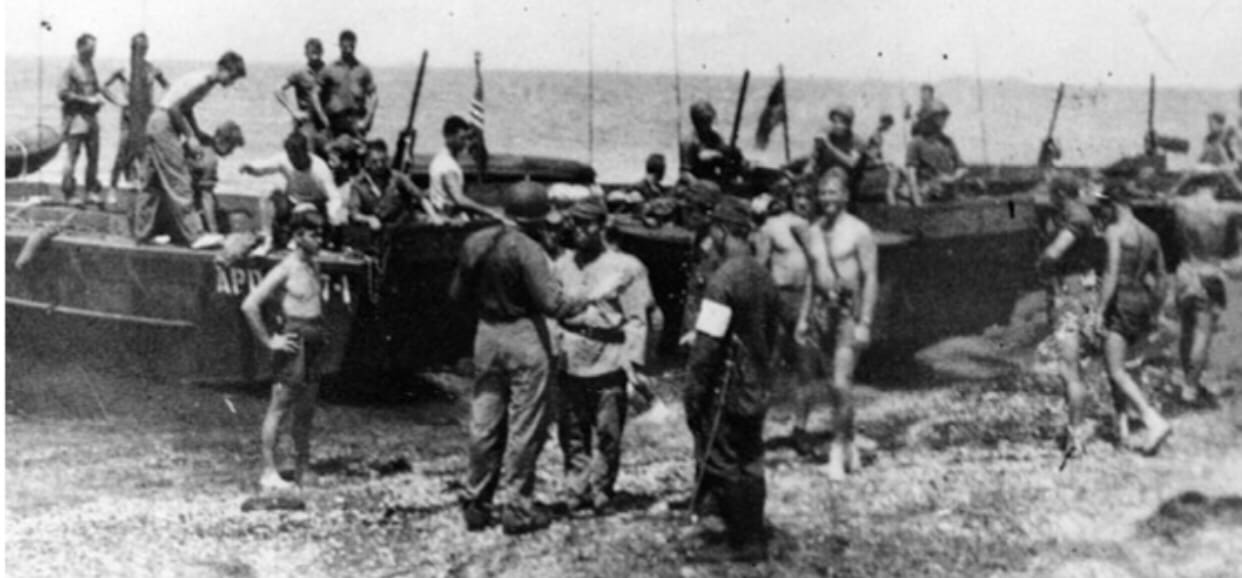
The combat diving mission was the same in World War II as it had been in previous wars: to remove obstacles from enemy waters and to gather intelligence. The Navy’s Underwater Demolition Teams (UDT) were created from bomb disposal experts and SeaBees (combat engineers) teamed together in 1943 to devise methods for removing obstacles that the Germans were placing off the beaches of France.

There where more than one combat swimmer/diver unit for the U.S. Navy in WW2. To name a few where the Navy Scouts and Raiders unit, Underwater Demolition Units (UDT), Navy Combat Demolitions Units (NCDU) and the OSS Maritime Unit. The OSS MU was on the cutting edge for U.S. combat swimmer/ divers. They where the first to use the Lambertsen Rebreathing Unit (LARU), an early underwater breathing device. The Lambertsen unit permitted a swimmer to remain underwater for several hours and to approach targets undetected because the LARU did not emit telltale air bubbles. Dr. Christian J. Lambertsen, then a U.S. Army captain, developed the Lambertsen for the MU. They also developed or used several innovative devices, including an inflatable surfboard, a two-man kayak, and limpet mines that attached to the hull of a ship.

The first UDT combat mission, wherein the Pacific. It was a daylight reconnaissance and demolition project off the beaches of Saipan in June 1944. In March of the next year, preparing for the invasion of Okinawa, one underwater demolition team achieved the exceptional record of removing 1,200 underwater obstacles in two days, under heavy fire, without a single casualty.

Diving apparatus where not extensively used by the UDT during the war. No suitable equipment was readily available to them. UDT experimented with a modified Momsen lung and other types of breathing apparatus, but not until 1947 did the Navy’s acquisition of Aqua-Lung equipment give impetus to the diving aspect of UDT operations. The trail of bubbles from the open-circuit apparatus limited the type of mission in which it could be employed, but a unique SCUBA (self-contained underwater breathing apparatus) platoon of UDT members was formed to test the equipment and determine appropriate uses for it.

UDT-21 (now SEAL Team 4) is credited with accepting the first official surrender on mainland Japan of WW2. Here the Commanding Officer LTCmdr Clayton of UDT-21 receives the first sword surrendered to the U.S. on mainland Japan. When he returned to the ship, he was ordered to return it so they could surrender to General MacArthur (just one more thing in a long list, that makes him one of the worst generals in history.)

At the end of WW2, most of the special maritime units where dissolved, all except a hand full of UDT teams. In the Korean Conflict, the Frogman started to come out of the water more and more. They where assigned targets like destroying bridges and other direct action missions.

In 1962, President Kennedy established SEAL Teams ONE and TWO from the existing UDT Teams to develop the Navy’s Unconventional Warfare capability. The Navy SEAL Teams were designed as the maritime counterpart to the Army Special Forces “Green Berets” with their primary focus on Direct Action missions. They deployed immediately to Vietnam to operate in the deltas and thousands of rivers and canals in Vietnam and effectively disrupted the enemy’s maritime lines of communication.

The SEAL Teams’ mission was to conduct counter guerilla warfare and clandestine maritime operations. SEALs also advised and trained Vietnamese forces, such as the LDNN (Vietnamese SEALs). Later in the war, SEALs conducted nighttime Direct Action missions such as ambushes and raids to capture prisoners of high intelligence value.

The SEALs were so effective, that the enemy named them, “the men with the green faces.” At the height of the war, eight SEAL platoons were in Vietnam on a continuing rotational basis. The last SEAL platoon departed Vietnam in 1971, and the last SEAL advisor in 1973.

In 1983 all UDT teams where turned into SEAL teams (SEAL Team 4 and 5) and SEAL Delivery teams (SDV 1 and 2). All branches of service have Combat Swimmer/Divers. In the Army, Rangers and Special Forces (Green Berets) can go thru Army combat diver school in Key West. The Air Force has a combat diver course for all ParaRescue and Combat Controllers. As both groups get assigned to work with all branches of Special Forces, they have to know how to dive as well. The Marines also have a Combat dive course that Marine Raiders and Recon personal attend.

Explosive Ordnance Disposal units. All branches also have EOD units. They are as old as the combat swimmer unit and have always been a big part of every military operation. Draper Laurence Kauffman, the man credited with starting the UDT, and being the first U.S. frogman was first an EOD officer with the British at the start of WW2. One month before Pearl Harbor he returned to the U.S. and joined the Naval Reserve. EOD personnel are some of the smartest people on the battlefield today. They are right there in the fight with all Special Forces and conventional units.

The mission of the combat swimmer has not changed much since it started around 450 BC. Combat swimmers still conduct special reconnaissance missions of beaches and harbors. They can climb out of the water to destroy something or even grab someone off a beach. The only thing that has changed is the technology that is available to them, but the basic combat swimmer skills will always be the same. Just about every country in the world is accessible from the water so the need for a combat swimmer will never go away.

SCUBAPRO Sunday – Jet Fins

Sunday, August 26th, 2018

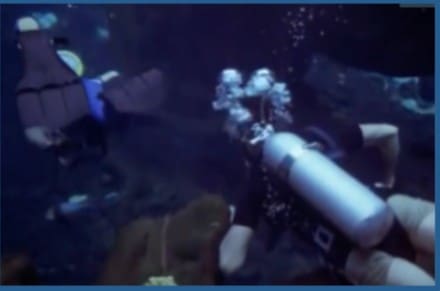
This famous fin, with its durable rubber construction and distinctively beefy shape, has been seen on dive boats, research vessels and in the world’s most remote dive locales since 1965, and it’s still the fin of choice among a host of professional divers the world over. The Jet Fin set the standard for power and durability when it was ?rst introduced over 50 years ago. Today, tech divers, deep divers, military divers, commercial divers and dive instructors, as well as old-school recreational divers, still strap on a pair of Jet Fins before hitting the water.
SCUBAPRO sold over 100,000 units in the first few years. That was an amazing feat in those days and set the standard for dive fins. We took the concept and proceeded to popularize the fin with the US Navy and other commercial diving operations. The fact that Jet Fins have been almost exclusively adopted by the Navy and the commercial diving sector speaks volumes about what type of diver would benefit from them – someone who needs thrust, durability, control and convenience. Its hard to not like a fin that Thomas Magnum and TC used when they dove on Magnum PI. Just saying.

Episode SO6 E11

93379657-9B87-46B5-BF93-BF323B57E076

F90CEC42-8851-4AB4-8766-432AB64D6B1D

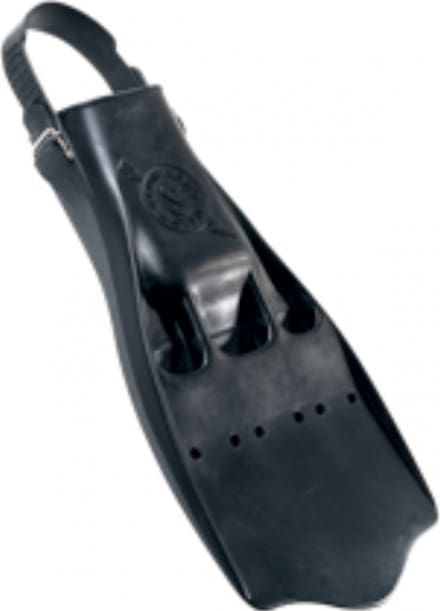
-Rubber construction is known for its durability, promising a lifetime of use. The Jet Fins are molded from one piece of rubber which makes them very durable and vertically indestructible. This will cut down on any maintenance that you will have to do on the fins, or the likely hood that you might damage them, meaning you will have them for many years to come. Jet Fins are made by using only one single compound which is rubber, molded in one piece and therefore unable to have “component failure” being as there are no screws, welds or connections to break as happens so often with modern fins. The Jet Fins are also flexible enough to provide excellent thrust, stiff enough to transfer all the diver’s leg energy into pushing the water backwards and robust enough to take literally any harsh conditions a diver can throw at it.

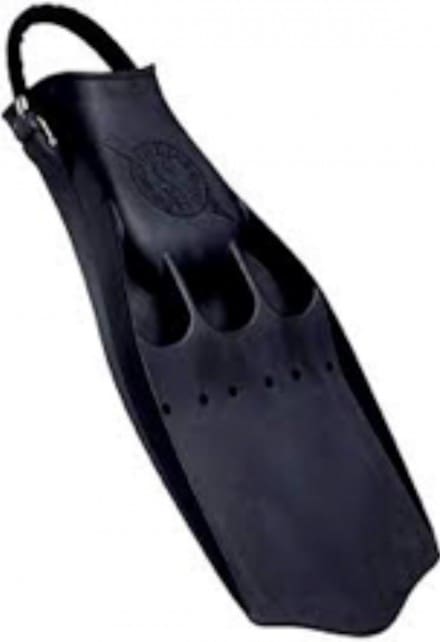
-The Proven vented design. Just below the foot-pocket, allows water to flow through the blade, reducing drag on the weaker upstroke, while enhancing trust and power on the down stroke. Many divers have their pair of SCUBAPRO jet fins for decades and literally swear by them. They are perfect for the frog kick and other kicking maneuvers.

-The Jet fin is also very compact. This feature is a must in confined spaces like cave, wreck divers and piers. The Jet Fins are broad and short, which means divers, are able to avoid kicking each other and the ocean floor.

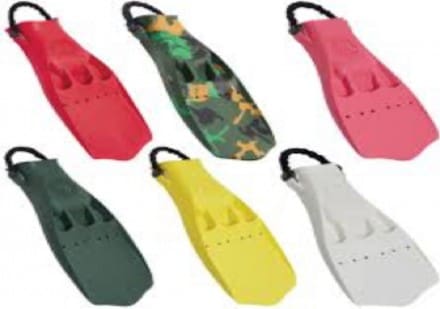
The Jet fin comes in, black, camo, red, orange, yellow, white green and pink. We can also make special orders if needed.

E8FB35D4-FF82-4255-9F68-87E01F772D3B

-The jet fins weighing about 5-7 lbs, and might not be suited for all divers but Mention “JET FIN” to virtually anybody who has a dive card or has gone to a military dive school and they’ll know exactly what you’re talking about. (I know memories of flutter kicks with them on, are running thru your head)

SCUBAPRO now offers two styles of Jet fins and two versions of heel straps.

32DA5D0B-B698-4F1E-8B5B-E477E3E023E0

00B7CBC8-F484-4EEC-9577-3092102A5A49

The original adjustable fin strap and the stainless steel spring heel. The original fin with the standard adjustable fins strap is still Made in the USA. The other version comes with a rugged stainless-steel spring heel strap that can lasts forever and makes donning and doffing as easy as can be. The steel spring was invented by cave divers that needed a fin strap that could last in some of the toughest places on earth and was quickly adopted by the military and other professional divers worldwide. The spring can be put on any of the jet fins.

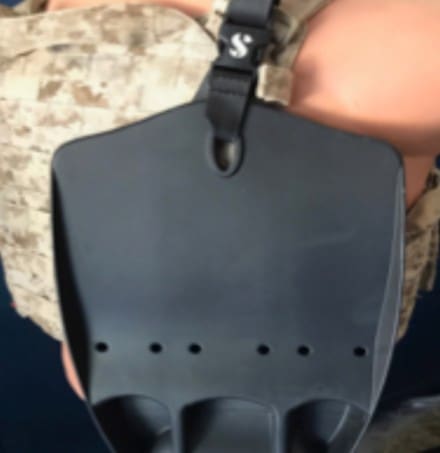
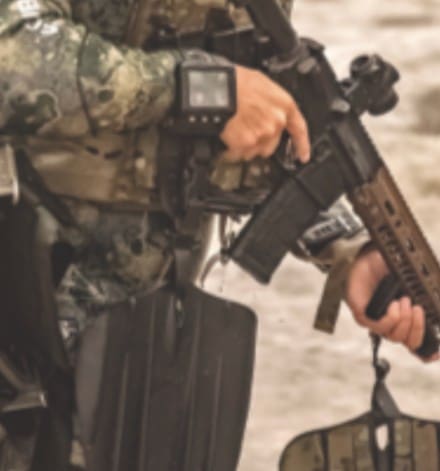
SCUBAPRO has two styles of Jet fins available. With or without a hole on the blade. Each fin includes a pairing hole that allows the fins to be hung or stored together, minimizing the possibility of misplaced or mismatched fins. It also make coming out of the water on a beach or climbing a ladder easier. You can also attach the fins to you wrists or back with the SCUBAPRO fin keepers or carbineer and 550 cord will work.

5EC02996-4D2B-4032-8412-ACAE50CD82D8

53C4A8F8-A635-42AA-8ADF-67D95F14A3BB

The Jets are renown for its power and its durability. They can last a life time and with proper care. They don’t really get sun damaged, salt eroded, chlorine discolored, travel battered, coral gouged or split. They are the strongest pieces of equipment that you will ever own. We had a retired master Diver that wanted to get a new pair as the ones that he had received in navy dive school in the 60s where getting a” little old” as he said. He called SCUBAPRO and asked about buying a new set. We told him we would give him a free pair. We asked if we could put the ones he has in our museum. He gave us a very polite “hell no I am not giving away my Jet fins”. We gave him a new set and he when home a happy man with two pairs of Jet fins.

When you’re diving with JET FINS, you are diving into a long line of history.

www.scubapro.com

SCUBAPRO Sunday- Knives

Sunday, August 19th, 2018

Dive Knifes

The general maintenance of your dive knife is easy and will not be hard as long as you get into a good habit of always raising the knife and scabbard in fresh water properly.

Post Dive care

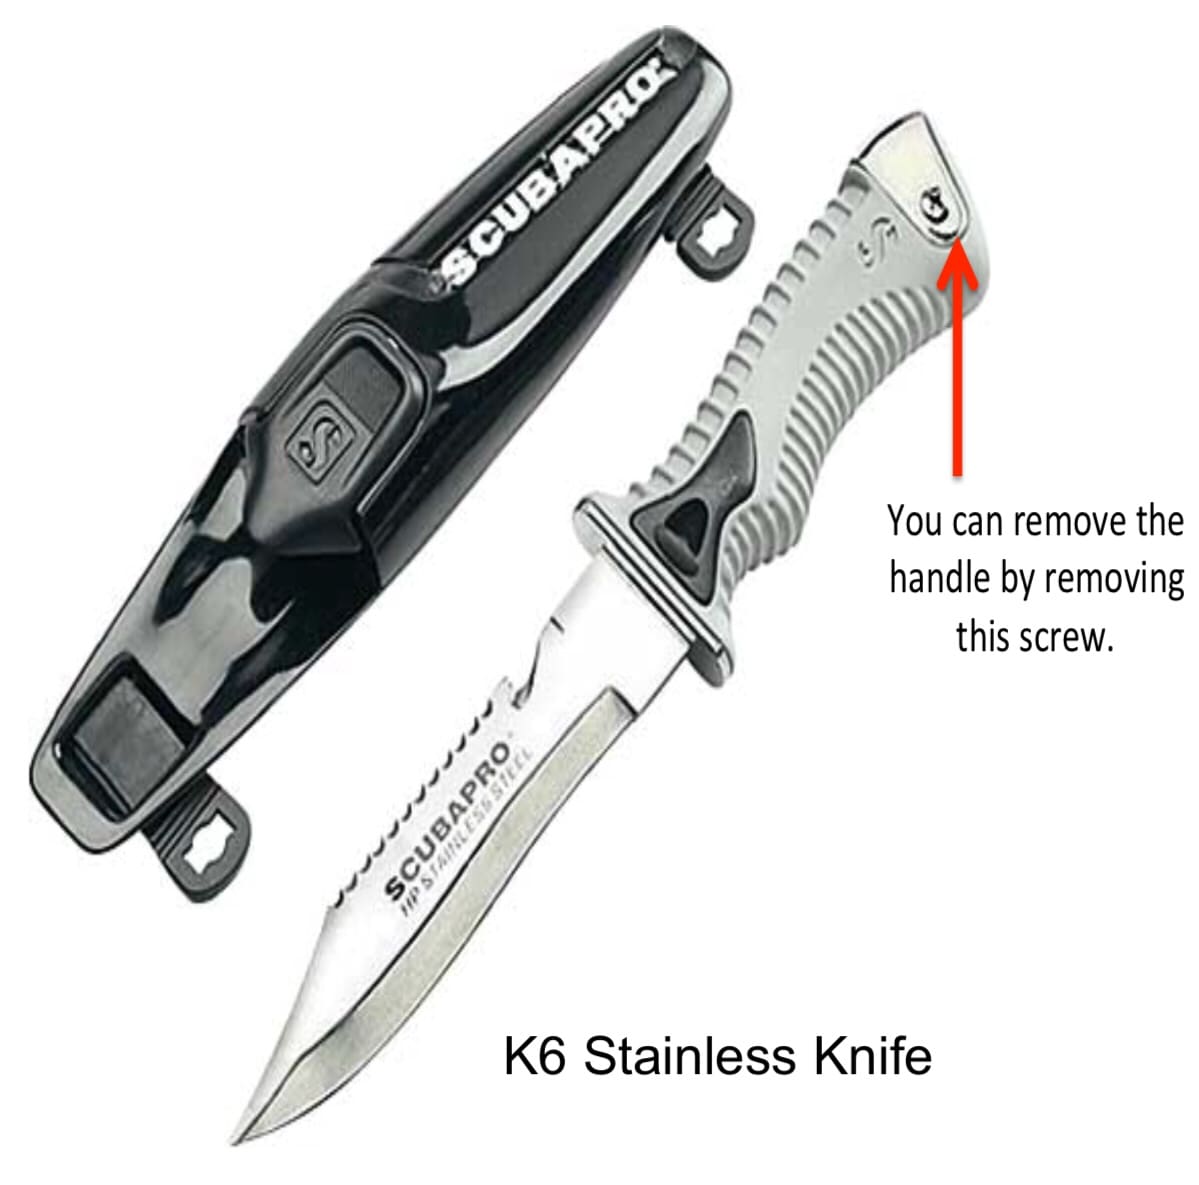
After diving, rinse the knife and sheath in fresh water. Wash the scabbard thoroughly to ensure no salty residue is left inside, remove the knife from the sheath and operate any moving parts while soaking. This helps remove sand and other debris that may have gotten inside. If not done properly when you put the knife back the remaining salt will cause the blade to rust. If the knife can be disassembled (usually by taking the handle off), take it apart and rinse the individual pieces in fresh water after every couple of dives or if you plan to store for a long time. This helps prevent salt buildup and corrosion from happening underneath the grip where you can’t see it. Dry all of the pieces thoroughly before putting the knife back together.

If you are done diving for the day you can apply a light coat of silicone to the blade to prevent corrosion, but don’t use a petroleum-based lubricant. Petroleum will attract dust and sand. Use a light oil designed for knifes for lubricating and storage. You will want to use a lightweight honing or mineral oil designed for knife care. If your knife does start to rust try and clean it as soon as possible. For very light corrosion, you may be able to wipe it off with just a towel or toothbrush. Again you can also use a cleaning cloth that is designed to help remove light rust marks. For more stubborn stains and rust, soak the knife in distilled white vinegar for about three – five minutes. Remove the blade from the vinegar and wipe it down. Again, a toothbrush will work nicely for removing the lighter stuff. An abrasive sponge can be used for tougher jobs but be careful not to scrub too hard because you could scratch the blade and you can also remove some of the outer coating and it will make it rust faster. Do not use a steel wool, as that will cause more rust to form later. The steel wool will leave small pieces of steel behind that will start to rust.

Rinse the knife in fresh water in the same manner as you would for post-dive care. Dry the knife thoroughly and apply a light coat of silicone to protect against corrosion.

K6 Stainless Knife

Storing your knife

You can store your knife in the scabbard once you are sure both the knife and scabbard are dry. For long-term storage you should store the knife outside the sheath/ scabbard.  If you have a leather sheath, that retains moisture and will cause rust.  You can store the knife outside the scabbard in a cloth that has some oil on it. They make cloths that are treated with mineral oil you can use or just spray some on one. Store the knife in a dive mask box or put the knife wrapped in the cloth in a Zip lock bag.

Sharping your knife

Dive knifes can be hard to sharpen as most have a straight edge and a serrated edge to them. So you cannot really use the easy methods, like a quick pull sharpener, that you just pull the knife thru. You can use a sharpening stone for the straight edge and a ceramic rod for the serrated edge.

1. With your knife at the correct angle, slowly draw the knife down and across the stone in a smooth motion, starting at the heel and finishing at the tip.

2. The number of times this must be done will vary depending on how dull your knife is. But what’s most important is that you do the same amount of pulls on both sides of the knife.

3. After five draws, flip the knife to the other side and repeat the heel-to-tip motion.

4. Repeat this process, but instead push the knife from tip to heel. Knives are used to cut in both push and pull motions, so it’s important to sharpen them in both directions as well.

5. Flip the stone over to the finer side, and complete steps again until your knife is sharp.

Serrated Edge sharping

There are lots of ceramic rods out there so I am just going to talk about one the Lansky rod. It is tapered so it will fit all sorts of sizes of serration bevels.

1. First size the bevel by taking the rod and place it in a serrated bevel so that the angle is the same. Run the rod from the top (side closest to the spine of the blade) to the bottom (the cutting edge) a few times in each serrated groove. Try and stay with the angle of the serration.

2. Knock off the burr by taking a fine grit sandpaper or sharpening stone and remove any burr from the flat side of the serrated grooves by making a few light passes. Be sure to only take the tapered rod to the width of each serrated groove so that it does not deform them. You don’t need to use a lot of pressure with this method.

3. If you don’t understand this look on YouTube there are a ton of ways to do this.

Titanium Dive Knives

Sharping a titanium dive knife is the same as a stainless steel, but there is a difference. Most companies recommend a diamond sharpener. You will have to make sure you know what type of titanium knife you have as some are only coated with titanium. If it is called military grade it should be pure titanium. Remember when sharpening to use a light touch, titanium is easy to deformed and excessive pressure in sharpening will roll the edge causing difficulties getting a sharp edge.

SCUBAPRO Professional Knife

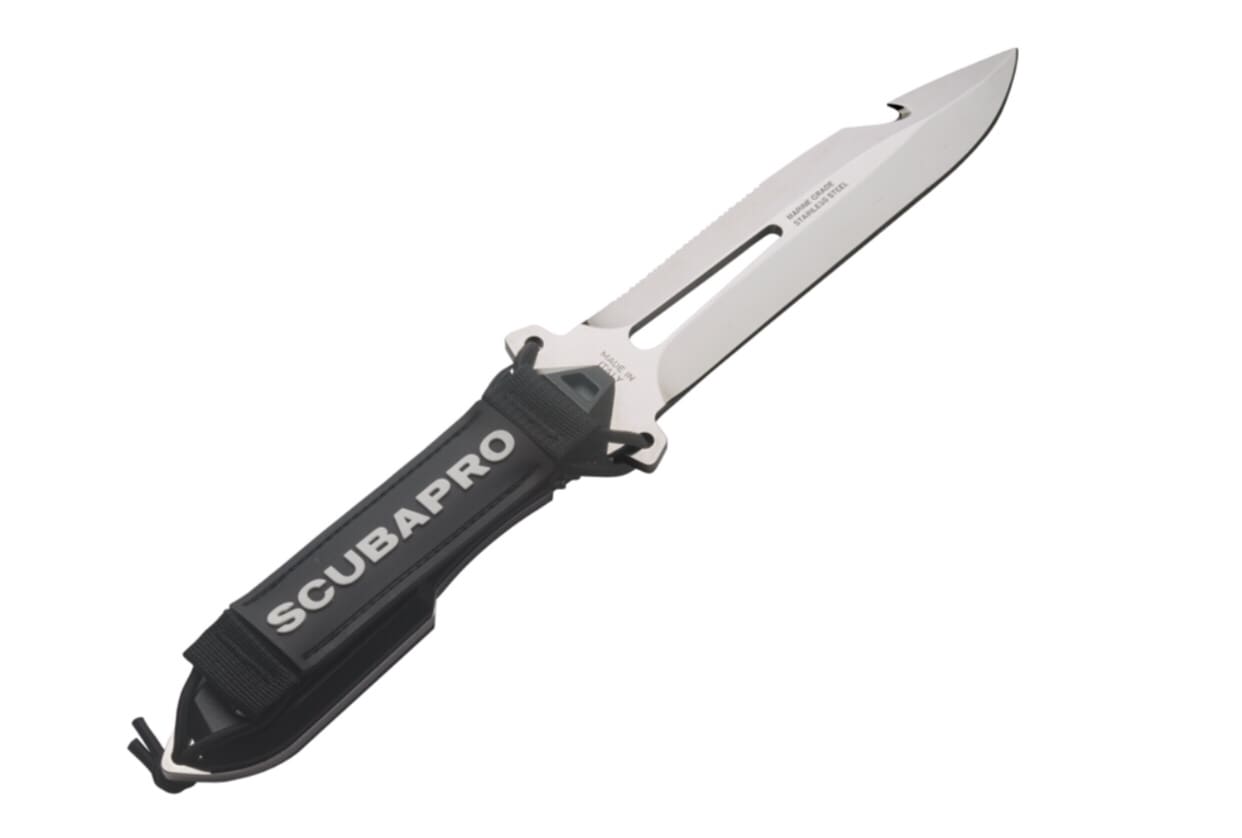
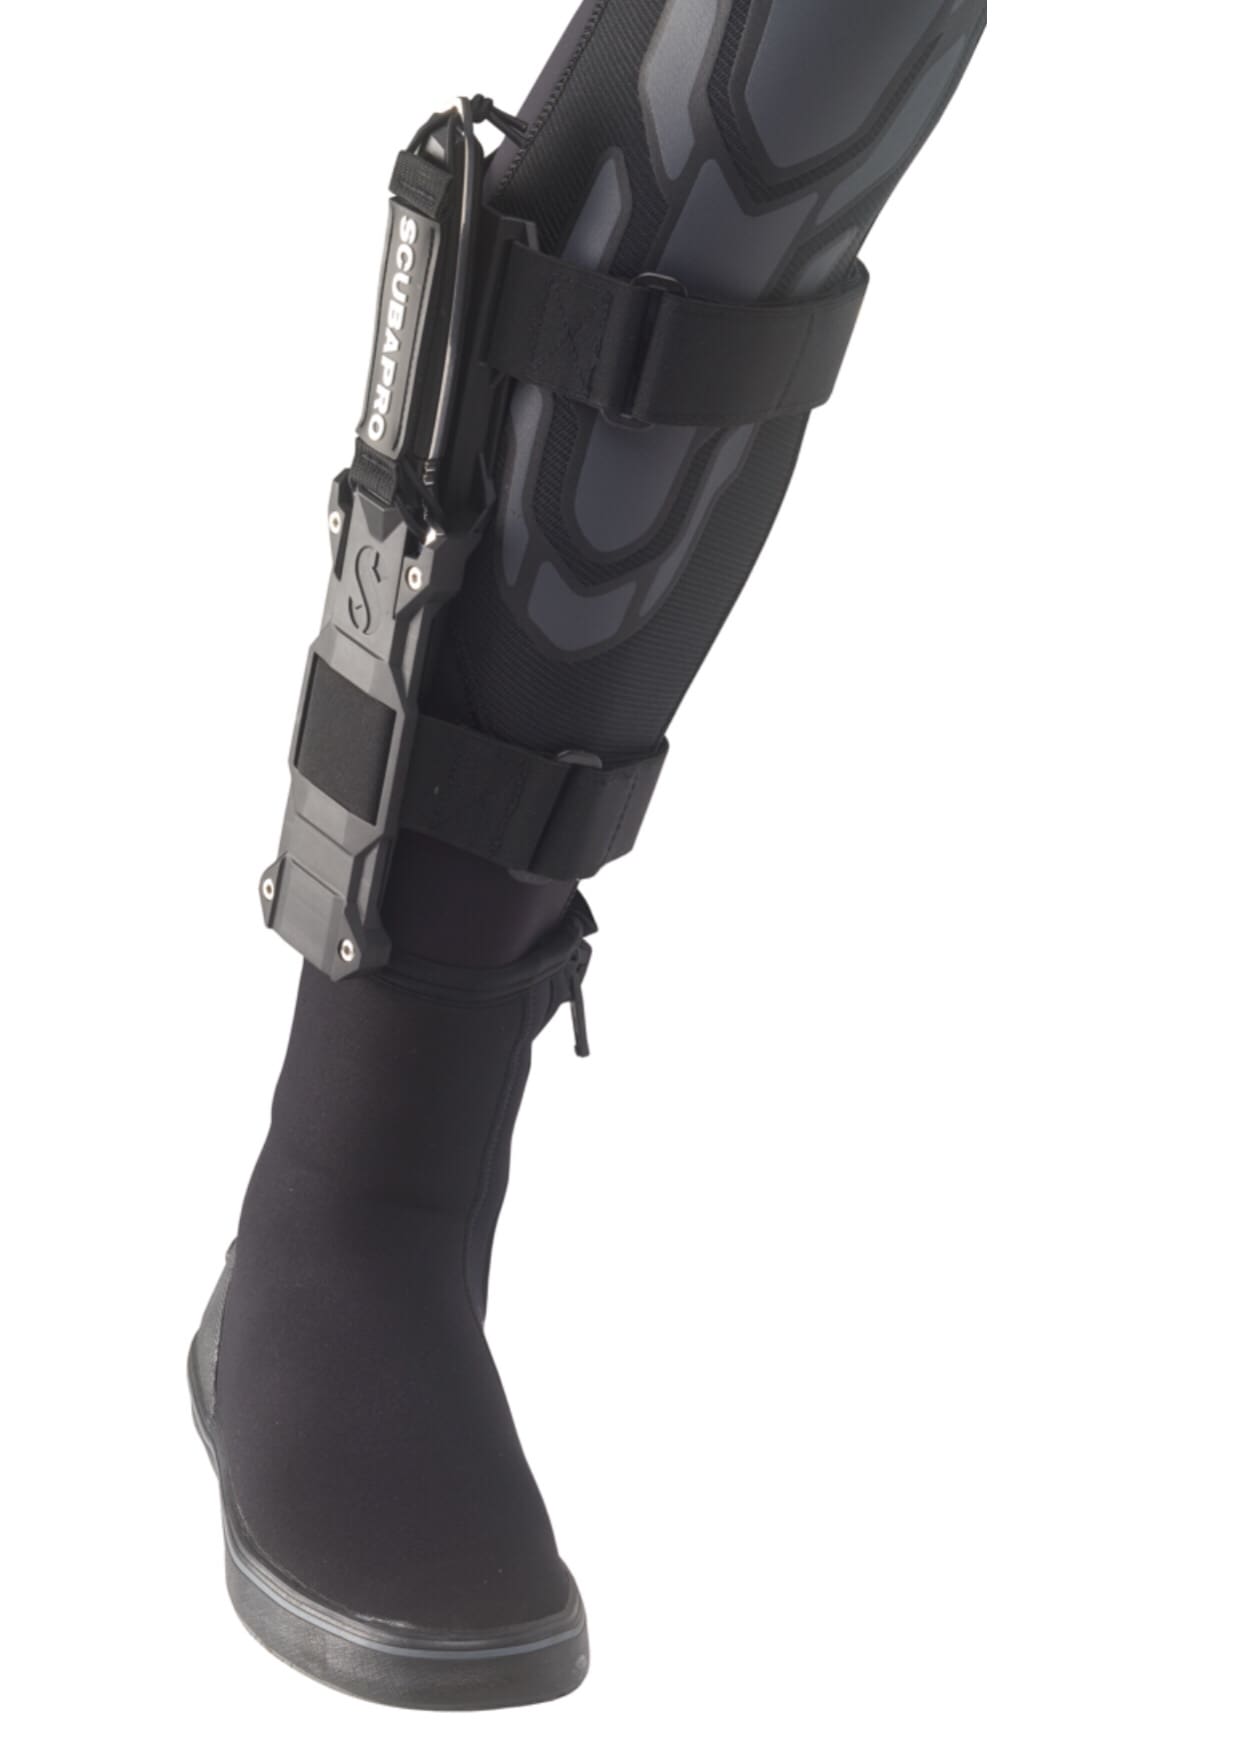
The SCUBAPROs TK15 is the first in a new series of Tactical dive knifes. It is built around a single piece of marine-grade stainless steel machined to achieve the ideal balance of strength and weight. Its surface is specifically polished to let water drain easily and prevent oxidation. The thickness of the stainless steel is consistent from one end to the other, creating a high level of stiffness. This is a traditional, heavy-duty, no-frills type of knife designed to handle all cutting jobs, large and small.

The blade is a generous 15cm/6in long and features a lower full-length smooth-edge and an upper serrated edge positioned close to the handle so you can maintain maximum control of the cut. A line cutter is positioned closer to the tip of the blade to enable you to easily hook lines, plus in this position it doesn’t weaken the blade. Also, a shackle key is built into the body of the blade, a great addition for boat divers.

Marine-grade stainless steel offers the best balance between cutting edge reliability and resistance to corrosion. This can be a difficult balance to achieve on the same piece of steel, but SCUBAPRO succeeded by adding a handmade polish finishing on the steel surface which promotes water run-off for long-term oxidation-free durability.

The TK15 comes with a heavy-duty handle that’s sized and shaped for solid gripping. The rugged sheath is made from fiberglass reinforced polyamide. The knife is kept in place by two teeth on the sheath matching the recesses on the handle. The sheath includes heavy-duty nylon straps for easy attachment and a SCUBAPRO branded hand cover with bungee to secure the knife to your hand under critical conditions.

www.scubapro.com