SIG SAUER - Never Settle

Archive for 2019

Max Talk 40: CQB: Methods of Entry: Diminishing Sectors

Monday, October 7th, 2019

This is the fortieth installment of ‘Max Talk Monday’ which shares select episodes from a series of instructional videos. Max Velocity Tactical (MVT) has established a reputation on the leading edge of tactical live fire and force on force training. MVT is dedicated to developing and training tactical excellence at the individual and team level.

This is a segment from the Max Velocity Tactical CQBC (Close Quarter Battle Course). The three day class covers Tactical Clearance methods. This specific period of instruction concerns the number one man entering an open doorway via the Diminishing Sectors method of entry.

The CQBC class is a three day event, day 1 on the flat range conducting individual skills and entry drills, using live fire and frangible ammunition. The latter two days are force on target and force on force at the CQB complex.

Max is a tactical trainer and author, a lifelong professional soldier with extensive military experience. He served with British Special Operations Forces, both enlisted and as a commissioned officer; a graduate of the Royal Military Academy Sandhurst. Max served on numerous operational deployments, and also served as a recruit instructor. Max spent five years serving as a paramilitary contractor in both Iraq and Afghanistan; the latter two years working for the British Government in Helmand Province, Afghanistan.

Website: Max Velocity Tactical

YouTube: Max Velocity Tactical

ArmyCon: Where Virtual and Reality Meet

Monday, October 7th, 2019

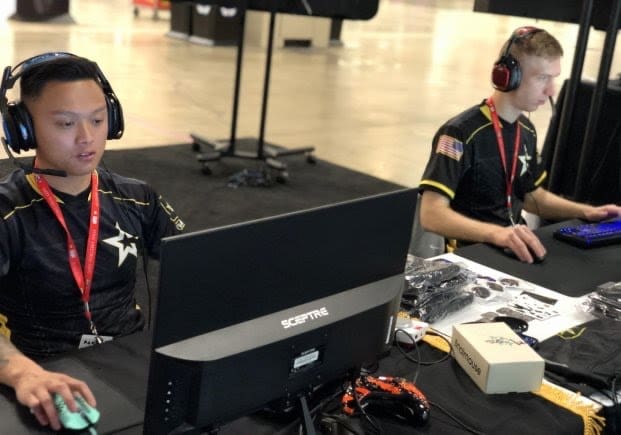
FORT KNOX, Ky. — The U.S. Army is aiming to connect the gaming world to the military characters and equipment featured in many of today’s most popular games during the first-ever ArmyCon at the Army Ten-Miler Expo Park and D.C. Armory in Washington, D.C., Oct. 11-12.

ArmyCon will showcase high tech, warfighting capabilities with interactive displays and demonstrations. Individuals can test their skills as virtual warriors in the Mobile Gaming Semi-Trailer and then meet the real-life Soldiers face-to-face, equipped with all the associated gear and weaponry, in one action-packed area.

Spectators can test out robots, climb inside helicopters, and challenge their hacking skills. They can even get a close-up look at two new pieces of Army tech — the Enhanced Night Vision Goggle — Binocular and the Black Hornet Nano Unmanned Aerial System.

The ENVG-B’s are the Army’s most advanced night vision goggle, providing close combat forces with the capability to observe and maneuver weather conditions during limited visibility and enabling Soldiers to shoot around corners. The Black Hornet is a tiny drone that offers intelligence, surveillance and reconnaissance support.

“There are so many young people who don’t know what high-tech jobs the Army can offer or what Army life is like,” said Maj. Gen. Frank Muth, U.S. Army Recruiting commanding general. “ArmyCon is a prime opportunity for us to start the conversation about the professional jobs our Soldiers do.”

ArmyCon will feature the two new outreach teams created this year — the Army eSports Team and the Warrior Fitness Team. The esports team will host a “Twitch” gaming tournament inside of the U.S. Army Mobile Gaming Semi-Trailer, which features scorpion chairs and a variety of gaming platforms.

In addition to the new equipment and the gaming trailer, attendees will have a variety of Army assets to experience up-close and personal, including:

-Electric motorcycle
-Talon EOD robot
-Percussion explosive neutralization system
-Portable X-ray
-EOD blast suit
-Cyber Protection Team (demo cyber effects, display geo tagging effects with social media)
-Helicopters
-Stryker

Along with the equipment, attendees can meet Olympians from the U.S. Army Marksmanship Unit, the Golden Knights Army Parachute Team, Rangers, Special Forces Soldiers, and more.

By USAREC Public Affairs

BE Meyers & Co Exhibiting At Booth #3825 At AUSA 2019

Monday, October 7th, 2019

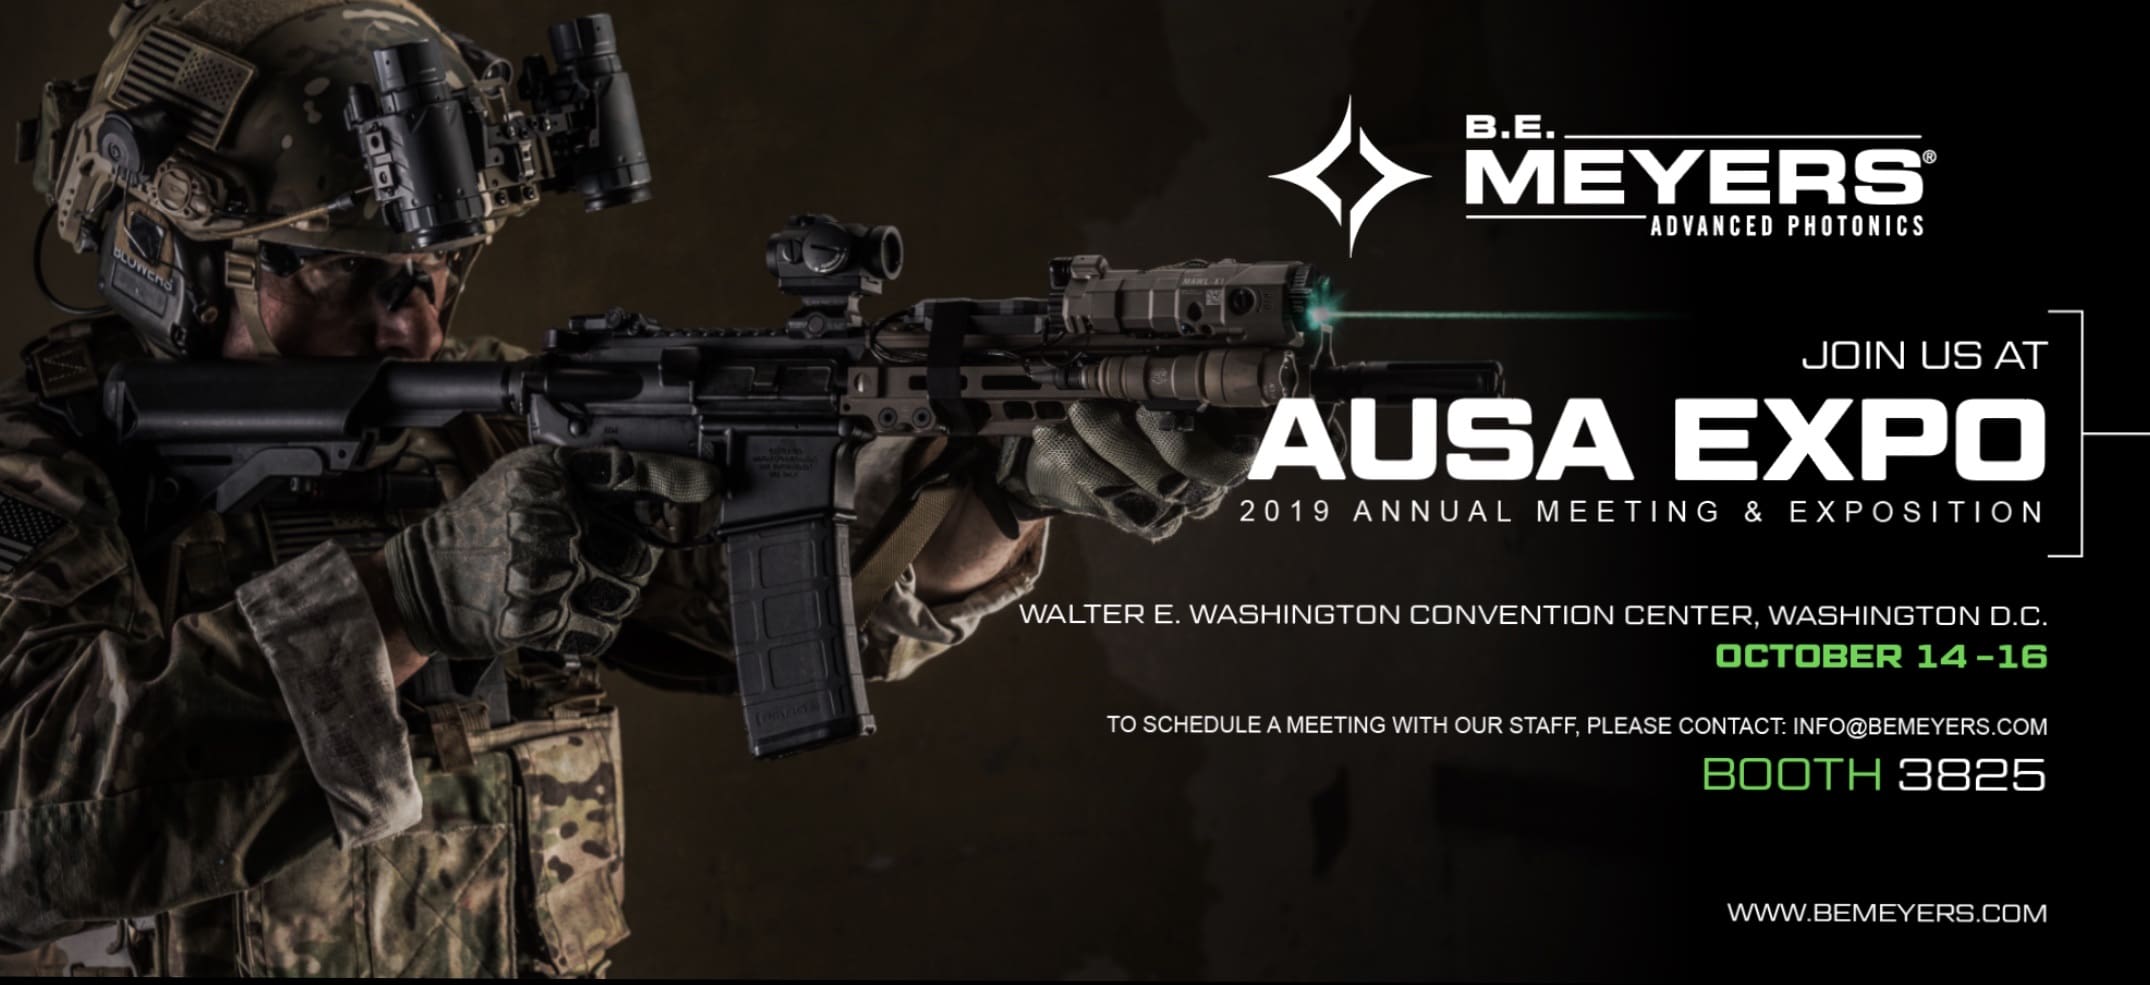
October 7, 2019 (Redmond, WA) – B.E. Meyers & Co., Inc., a manufacturer of optoelectronics and advanced photonics for the defense and aerospace industries, will be exhibiting at the Association of the United States Army’s 2019 Annual Meeting (AUSA), on October 1416, booth #3825 at the Walter E. Washington Convention Center in Washington, D.C.

B.E. Meyers & Co. will be showcasing the recently announced MAWL®-X1 alongside other MAWL® (Modular Advanced Weapon Laser) variants which bring increased effectiveness to modern weapon systems, and set a new standard for NIR pointing and illumination on the battlefield. Other products on display include the BOARS®-M2 optic and accessory mount selected for U.S. Army fielding; the GLARE® RECOIL (LA-22/U) ocular interrupter system for Hail and Warning/Escalation of Force scenarios; the IZLID® series of IR and SWIR pointers and illuminators; and the M2A1F .50 Cal threaded flash hider.

To schedule a meeting with a member of the B.E. Meyers & Co. Team at AUSA 2019, please contact info@bemeyers.com.

For more information about B.E. Meyers & Co. products, visit www.bemeyers.com.

Night Driving With The Boyz…

Monday, October 7th, 2019

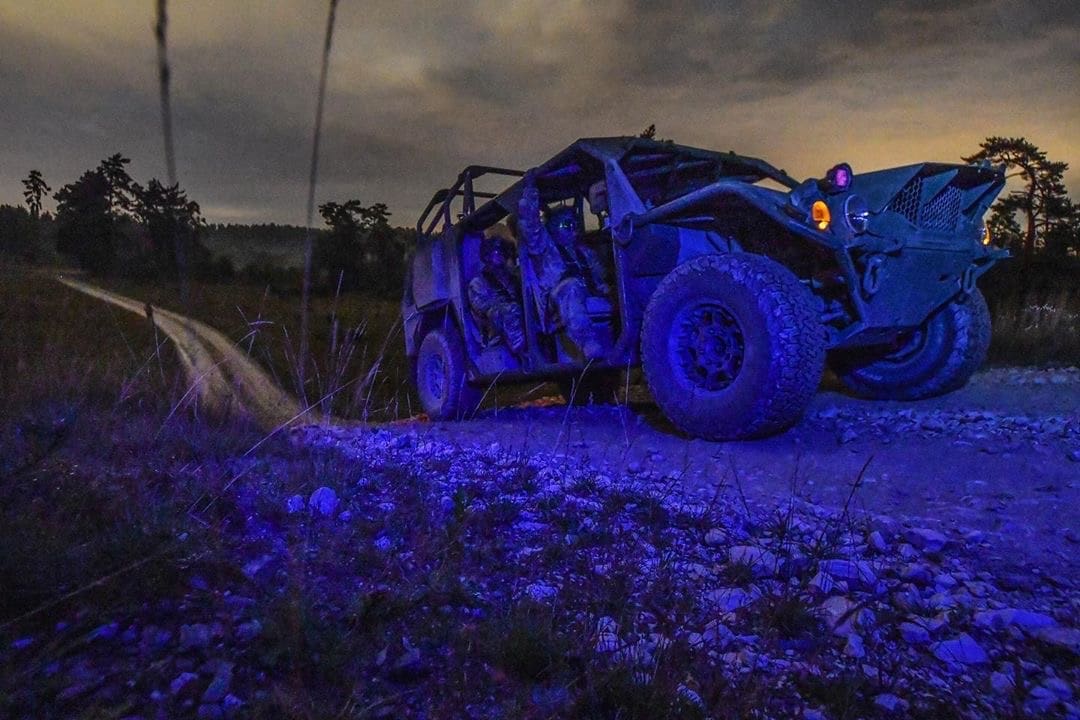
This photo was taken by Army Photojournalist, SGT Henry Villarama and posted to his Instagram account.

I took this photo last night while photographing our brigade’s new Army Ground Mobility Vehicles.

I took this photo around 2230. There wasn’t much illumination from the moon and there wasn’t much I could grab from the sky.

I was having zero luck capturing the GMV moving in the night. After a few runs with these guys driving past me at 40mph, I decided to paint the vehicle with the lights from my headlamp.

White light was lame and everyone has seen red light photos. I decided to use the blue. I think it works just fine.

Here are the settings I used to take this photo:

Nikon D500 | 13mm | 7 seconds | f/5 | ISO 4000

My name is Henry Villarama. I’m an American paratrooper, photographer and student of leadership. I am proud to visually articulate the work of our Paratroopers and Soldiers to the world every day. It’s an honor to serve and I greatly appreciate the unique opportunity I have to tell our Army’s story through photography.

Follow SGT Villarama on Instagram instagram.com/villarama_photo

300 BLK Ammo Management Tip

Sunday, October 6th, 2019

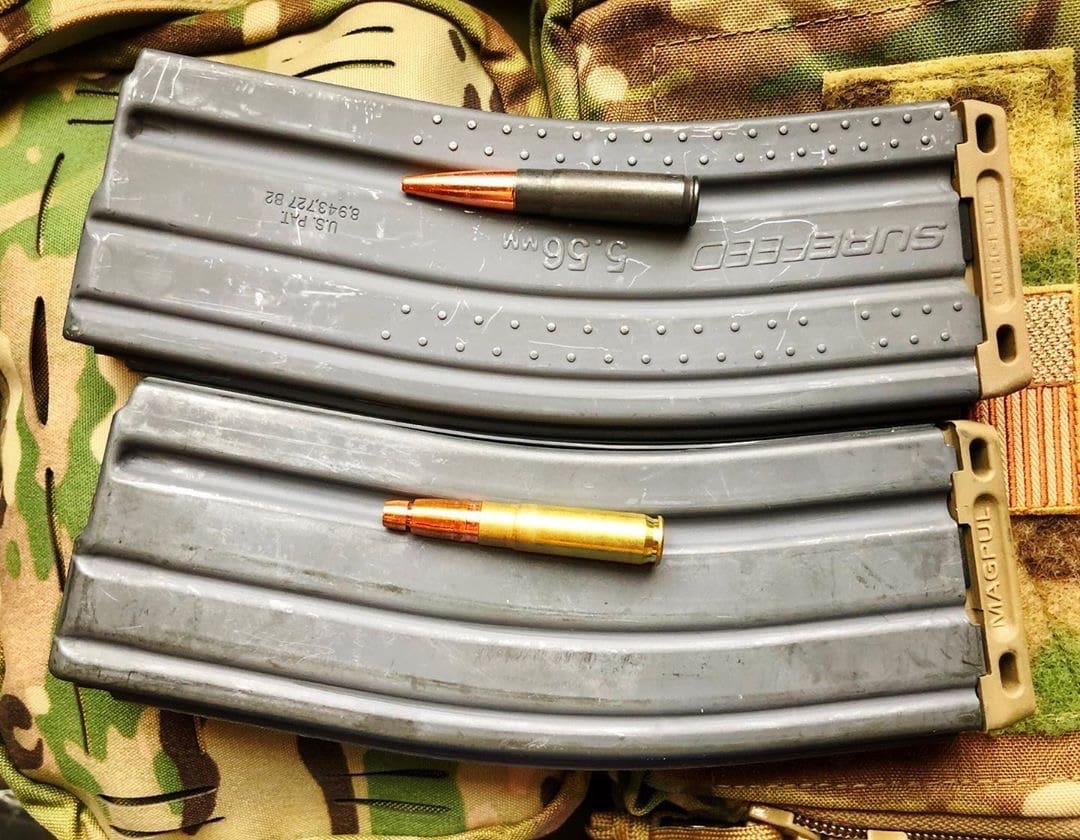
John Hollister of SIG offered this tip to keep your 300 BLK ammo straight while at the range.

I get a fair amount of questions about ammunition management with 300 Blackout. One of the beauties of Blackout is the ability to use either Supersonic or Subsonic ammunition interchangeably. But how do you keep them straight?

I use two different looking and feeling magazines. I used to use both Aluminum and Polymer or 30s and 20s to segregate ammo types. Since Surefeed Magazines came out with the dimpled E2 magazines, I have gone to Supers in the E2 magazines and Subs in standard “GI” magazines, in this case a Brownells magazine. Both have Magpul followers and floor plates. You can see and feel the difference day or night. Shown is SIG 120gr SBR Supersonic all Copper and Discreet Ballistics 188gr Subsonic all Copper, both will fully expand in barrels down to a SIG Rattler length, 5.5” 1/5” twist. Another tip on magazines, when you clean you rifle, you should be completely cleaning your magazine.

Happy magazines make happy rifles.

SCUBAPRO Sunday – Starting an Outboard Motor

Sunday, October 6th, 2019

Move the shift lever to NEUTRAL.

You MUST supply water to the engine before attempting to start it. Use mouse ears or have the lower unit in the water. Engine damage can occur quickly. Watch for Engine Overheating or No water Flushing.

Be sure the engine is in the normal operating position.

Open the vent screw on the fuel tank cap.

• Turn it clockwise to close.

• Turn it Counterclockwise to open.

Make sure the fuel line arrow is pointing towards the engine.

Squeeze fuel primer bulb, the outlet ends up, until firm.

All Models

If equipped, attach the clip and lanyard assembly to the emergency stop switch / STOP button. Snap the lanyard to secure a place on your clothing or life vest

1. Emergency stop switch / STOP button Move the shift lever to NEUTRAL.

NEUTRAL

Start-up (Cold Engine)

Pull the choke knob fully out. Twist the throttle grip to START position.

Start-up (Warm Engine)

Align the arrow mark on the throttle grip with the START position. Do not use the choke.

1. Choke knob

2. Throttle grip

3. Start position

4. While seated, grasp the starter handle and pull slowly until the starter engages, then pull hard. Allow the starter cord to rewind slowly.

5. If your engine doesn’t start after three pull, push the choke knob in and repeat the starting procedure.

After Engine Starts

1. Gradually, push the choke in after the engine is warm.

2. Check the water pump indicator. A steady stream of water indicates that the water pump is working. If a steady stream of water from the water pump indicator is not visible, stop the engine.

3. Twist the throttle grip to IDLE position or slower. Move the shift lever to NEUTRAL.

Outboard Won’t Start

It doesn’t matter what brand of outboard you are us most of all starting problems are caused by the same group of things and don’t require a mechanic. At most you should only need a screwdriver and a roll of riggers tape. However, if you jumped this motor in or if you just did a lockout and brought it up from a sub. There might be other things that are wrong that you will need tools for. You should always have tools and some spare parts on the boat.

Start by noticing essential clues as to the cause:

• Sometimes the motor will sound like it’s not even really trying to start; other times it’ll sound like it’s almost starting.

• Is there an external tank connected by a fuel hose? If so, is the arrow on the line pointed the right way?

• Do you smell gas?

• Does it start okay, then die when you put it into gear?

WHAT TO CHECK WHEN THE OUTBOARD DOESN’T SOUND LIKE IT WANTS TO START

Three (or four with an electric start) things to check when the motor doesn’t even sound like it wants to start, regardless of whether it has an internal or external tank:

Kill Switch. Make sure that the kill cord (aka “deadman”) is appropriately attached to the motor. Don’t just look at it — generally, if it’s even a tiny bit out of place, it will stop the engine — or prevent it from starting. Always try and have an extra on every boat. You never know when it might get lost.

Out of Gas? Check that there is gas in the tank.

Tank Switch. If your motor has both an in-motor gas tank and an external tank, there will be a switch to choose which tank the motor is using (it’s usually on the front of the motor). Make sure it is set to the correct one! It can easily get bumped to the wrong position when the motor is removed or when the motor is tilted up and down.

WHEN THE OUTBOARD ALMOST STARTS, THEN DOESN’T

Two things to check when the motor sounds like it’s almost starting:

Choke? Try to start it both with and without using the choke, regardless of what the standard starting procedure is.

Throttle? Try varying the throttle position a little. Sometimes giving it a little more or less gas will help.

OUTBOARD STARTING PROBLEMS WHEN USING AN EXTERNAL GAS TANK

If your outboard has an external gas tank, there can be a number of problems between it and the motor. Do a quick visual inspection from the tank to the motor and then run your hand up the fuel hose. Many times, the problem will be very apparent when you do this.

Tank Vent Open? If you are using an external tank, make sure the vent on it is open. If it is not, air cannot flow into the tank to replace the volume of gas that is being used. Eventually, there will be a vacuum, and the motor won’t be able to suck gas from the tank. If the vent is open, but the tank looks “sucked in,” the vent may be clogged (infrequent, but it can happen). Try cracking the gas cap to let air into the tank — if this works, you can probably get to where you are going with the cap cracked (unless the seas are bad then you will have to watch out to make sure water does not get in the tank. If you have anything waterproof, you can put it over the tank make sure that it can still get air) Try cleaning the vent.

Fuel Line Connected or pinched the fuel line can come just slightly disconnected at either the tank or motor end. Don’t just look at it; remove the fuel line, reconnect it, and then tug gently to make sure it’s fully clipped on at both ends. If you put your fuel at the front of the boat to help even out the weight, then make sure no one is stepping on it or if it is pinched. You might have to Moe the fuel closer to the back. Check that the fuel line isn’t kinked or under something that could partially block the flow.

Squeeze Bulb. Squeeze the bulb in the fuel hose to get fuel up to the motor. Squeeze until the bulb is firm, don’t try to force it as you’ll end up flooding the motor.

If you have just replaced the fuel hose or bulb, double-check that the arrow on the bulb points from the tank to the motor (it has one-way valves in it). If you squeeze and the bulb stays “squeezed” or is slow to regain its shape, check that the tank vent is open; if it is, you probably have a blockage in the hose, or it is kinked.

If you squeeze the bulb and it never gets hard or takes more than 5 or 6 squeezes to get hard, there is likely a crack/cut/nick in the fuel hose between the tank and the bulb which is pulling in air.

If you squeeze the bulb and smell gas, you almost certainly have a cracked, cut or nicked fuel hose between the bulb and the motor, or the fuel line is not securely connected to the motor.

Cracked, Cut Fuel Hose OR Loose Connections. If the leak is on the pressure side (between the bulb and the motor), you’ll usually be able to see where the fuel is leaking. If it’s before the bulb, you simply have to look and feel to find the imperfection. Also, note that it may be a hose clamp that has come loose, or it’s possible for the squeeze bulb to have a crack in it (sunlight rally is the enemy to anything rubber).

If it’s a loose connection and you have a screwdriver, you can tighten it. If it’s a crack or nick, a few wraps of tape will often hold the hose together enough to get back to the big boat.

Blocked Fuel Hose.

Pump the squeeze bulb a few times and see if there is good fuel flow with each squeeze.

If it seems like there is a blockage, the long-term solution is to replace the hose. As a get-home measure, keep your speed low (so as to need less fuel) and keep pumping the bulb to help force fuel through the blockage. This will work for a brief stint, but once the delamination starts, it quickly gets worse. Replace the hose ASAP!

HOW TO TELL IF THE OUTBOARD IS FLOODED

Flooded refers to flooding the motor with fuel, not having dropped it in the water.

If you try starting the motor and smell gas, the motor is likely flooded (yes, as noted above, the gas smell can come from a cracked fuel line, but that is not as likely). Do NOT use the squeeze bulb – it will just flood the motor!

You have two choices for a fix:

• Wait about 10 minutes and try starting again.

• Do not use the choke, open the throttle all the way, and try starting again — it will usually take at least 2 to 3 pulls. If it doesn’t start with a half dozen pulls, wait 10 minutes and try again.

Sometimes, after flooding, it will start and then die. If that happens, mainly if it was a cold start, you can now start it using your typical “cold start” procedure with choking it, etc.

OUTBOARD STARTS BUT DIES WHEN YOU PUT IT INTO GEAR

Starting then dying when you put the motor in gear is the classic symptom of having something caught around the propeller — usually, a line or something, if you are off the coast of California, then there is a good chance its kelp. Also, if you have the prop-protectors on then tend to get foaled a lot easier. Leave the motor off and tilt it up to check, remove the kill switch then remove whatever you find. After you are done put the kill switch back on.

CONCLUSION

If the motor won’t start, walk-thru your steps, is the kill switch in? Does it have fuel? Is it getting fuel? Is it getting air? Walk your way from the gas to the motor. Systematically think about what the problem is most likely to be and check those items first. Lastly, remember if you have jumped the motor in, then there are a lot more things to look for then what I have just talked about. I will save that for another Sunday.


Free Tool Boxes For Veterans

Sunday, October 6th, 2019

We’ve got a lot of veterans in my family. Not only is my father a veteran, but he’s also a retired Air Force maintenance guy. He recently ran across an announcement for “free tool boxes for veterans” and suggested that I share it with my readership. I thought it was a good idea, so here it is?:

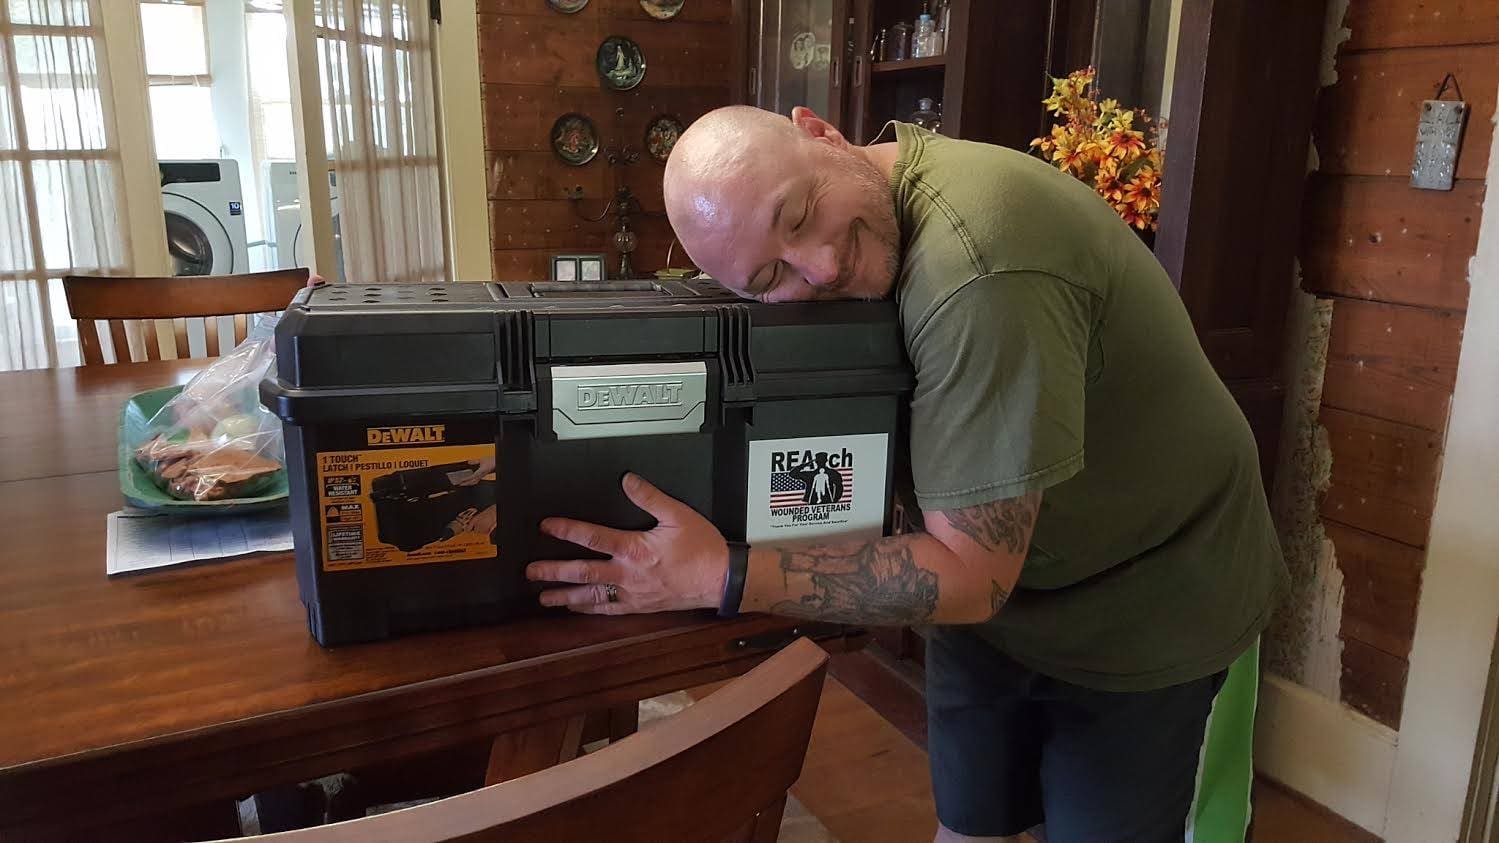
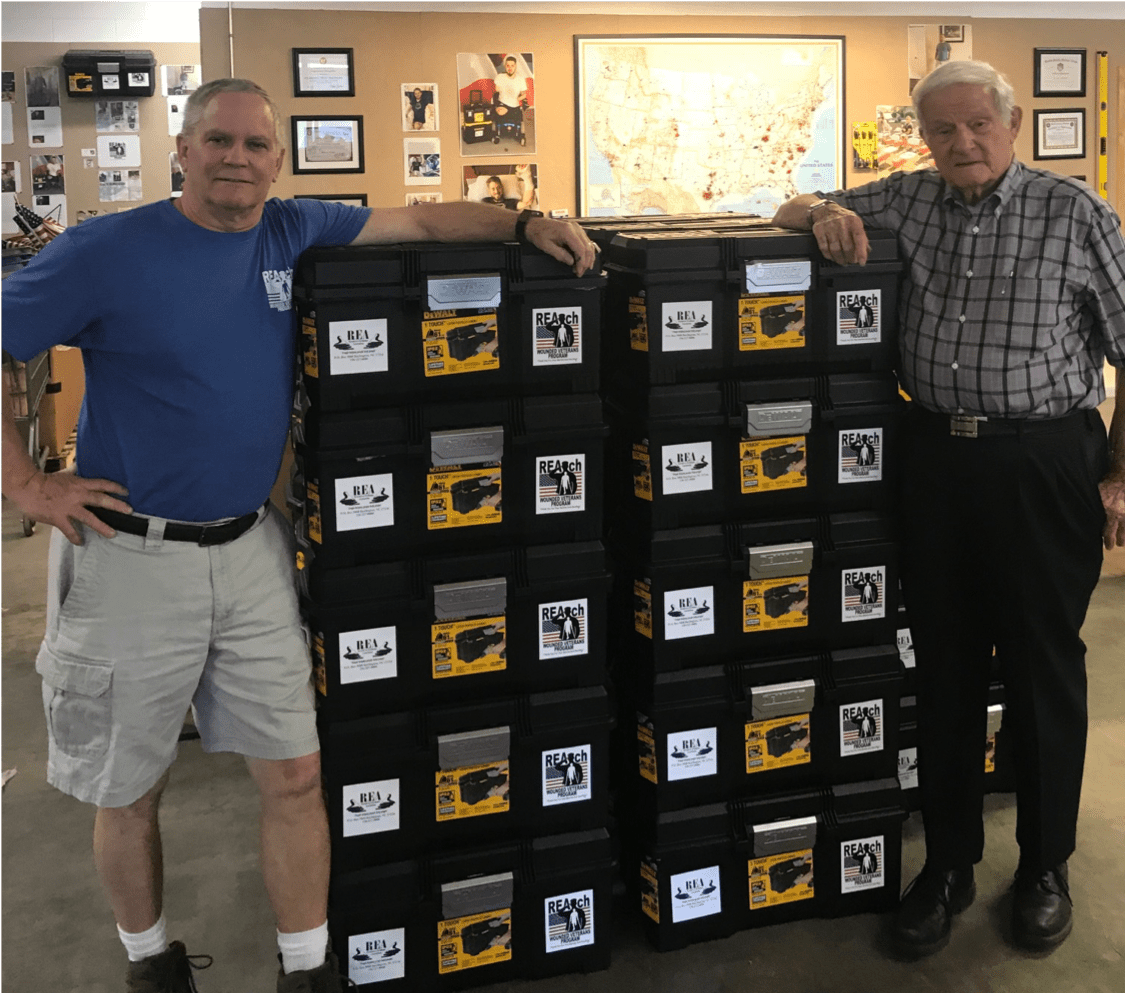
REAch program has shipped more than 8,000 toolboxes to Veterans

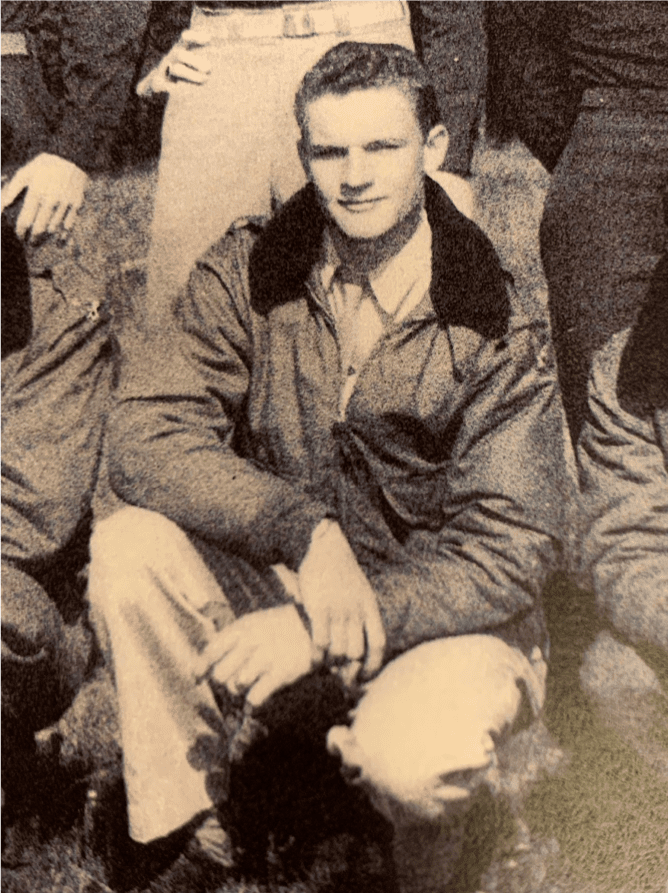
In 1994, U.S. Army Air Corps WWII Veteran and former POW Clarence Robert “Bud” Shepherd opened a small warehouse in Burlington, North Carolina, to assist 501 (c) (3) non-profit organizations, like schools, churches and daycares.

Shepherd refocused his attention on Post-9/11 combat wounded Veterans in 2012 by creating the Veteran Toolbox Program. He provided them with free toolboxes to assist with their transition into civilian life. Although Post-9/11 Purple Heart Veterans are priority for the program, all Veterans can apply.

“I always wanted to do something for Veterans, and I came up with the toolbox program,” said Shepherd. “We talked to some tool companies, and they were interested in getting involved. We talked to Stanley and Black and Decker about what we wanted to do and they came back with one word – absolutely! APEX tools, Wooster paint brushes, and Johnson & Johnson are also great supporters.”

The REAch Veteran Toolbox Program has shipped more than 8,000 toolboxes to Veterans, which contains about $600 worth of tools.

“This is the most satisfying thing I’ve ever done in my lifetime,” said the 94-year-old.

Shepherd works six days a week, gets up at 5 a.m., and leaves work at 6 p.m. most days. But he’s no stranger to hard work.

He enlisted in the U.S. Army Air Corps in 1943, when he was 18 years old. He served in the 8th Air Force in England as a tail-gunner on a B-17. Enemy forces shot down his plane six months before the end of WWII. Shepherd was captured and sent to a prisoner of war camp near Berth, Germany.

“Once we got settled down, things went along fairly smooth because there was 9,000 of us, all Air Force people,” Shepherd recalled. “About 7,500 Americans and a few Brits. We were liberated by the Russians and I made my way back home.”

“We hear from a lot of these guys and their families,” Shepherd said. “Last week we got an e-mail saying ‘You saved my husband’s life. He hasn’t been out of the house in three months but ever since he got his toolbox he’s been out in the garage or the backyard working on something.’”

REAch operates in Graham, North Carolina, but ships the toolboxes across the country.

“I go to the VA hospital in Durham, North Carolina, for yearly physicals, but my health is excellent,” he said. “These people down there that I deal with at the VA hospital, they are just good people… In my lifetime, I’ve been blessed, and I enjoy every minute of it.

Learn more about the Veteran Toolbox Program at: reainc.org

This article was written by Tim Hudak and published via blogs.va.gov.

Author Tim Hudak joined the VA in December 2013 and is on the Veterans Experience Office team. Tim, a Chicago-land native enlisted in the Marine Corps straight out of high school. As an intelligence analyst he deployed to Al Anbar province, Iraq with Marine Heavy Helicopter Squadron 363 in 2006 and 2008. After the Marine Corps, Tim used the GI Bill to earn a degree in Intelligence Studies from Mercyhurst University in Erie, Pa., and co-founded the university’s first student Veteran organization. Tim is active in many Veteran organizations.

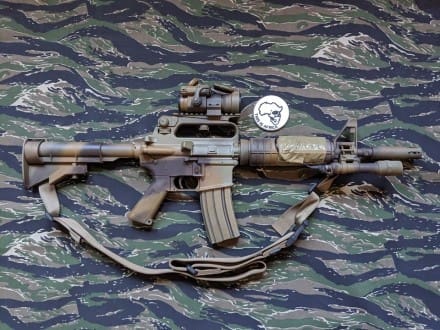
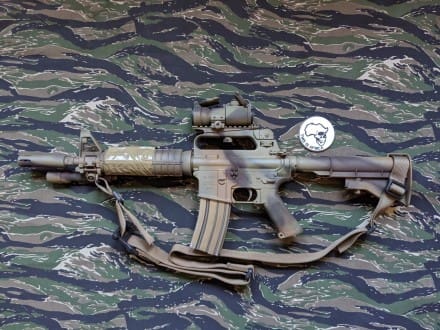
Homebrew Blood Diamond Carbine by Frank Woods

Sunday, October 6th, 2019

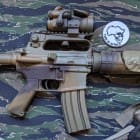
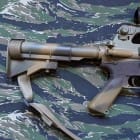
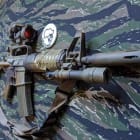
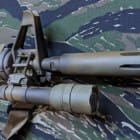
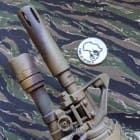
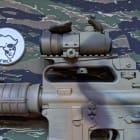
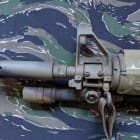
I’ve been wanting to do a Blood Diamond CAR-15/XM177/GAU-5/whatever you’d call it for a long time now, and with Brownells, Inc. putting a bunch of parts I needed for it within reach via their Retro line, I was finally able to get to it.

There are some obvious inconsistencies between mine and the movie version (pics included for comparison,) primarily the light (I had extra M600Us laying around and didn’t feel like paying extra money for the lesser Surefire 660 light,) and the Teal Blue Bravo PDQ ambi bolt catch/release (because it’s 2019 and none of my USGI forged lowers don’t have one, for sake of consistency.)

I used Fulton Armory receivers since they make the A2 upper receiver with M4 feed ramps, and went with one of their lowers to have a matched set. Barrel is a Brownell’s Retro Series 10.3″ 1/7 twist, and the stock and A1 grip come from the Retro line also. I had the faux moderator laying in the parts bin for YEARS waiting for the other parts to come along, well before the Brownell’s Retro line existed.

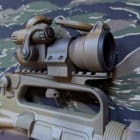
Aimpoint is a PRO 2MOA that didn’t have a rifle to sit on, but since it looks externally the same as the OG Aimpoint CompM2, fuck it, why not. It sits on an ARMS #2 carry handle rail mount, in an Aimpoint SRW-L mount I procured with help from a friend.

I did my due diligence trying to replicate the patterning of the rattle can colors as they appeared on the movie gun itself, the side we could see anyway. Colors used were Aervoe Olive Drab, Field Drab, and a little bit of Marine Corps Green, and the Dark Brown was either Krylon or Rust-Oleum, I don’t remember which. I misted it with some ODG & MCG once the overall painting was finished. Since I couldn’t find OD Green camo form wrap in stock anywhere I went with olive drab USGI style duct tape to secure the light’s ST-07 switch to the rifle.

The Surefire M14 style light mount clamp had to be shaved down on the grinder wheel a bit to fit it through the slot in the FSB, and I didn’t need the M10 ring to secure the light since the integrated 1913 mount on the Scout body clamped onto the light mount’s rail perfectly.

Magazine is an old ass pre-ban USGI mag that has this cool patina to it. I went with a Magpul MS1 sling because the tension adjustment is second nature to me being that I’ve standardized on this sling otherwise. I *tried* to make it work with an R4 sling but unless I ONLY had the sling around my neck it just fuckin sucked because of the way the fabric would dig into my shoulder when the sling twisted.

I guess I can call this one the “Danny Archer.” Yah yah ?