FirstSpear TV

Archive for the ‘Maritime’ Category

SCUBAPRO Sunday – Adding Pockets

Sunday, October 27th, 2019

Typically when you are diving, you want to stay as streamlined as possible. It will help keep you on time and help you use less air. But sometimes you have more things to carry so you might need to add more storage. The major problem with pockets on your thighs or hips is the drag it will create. When these pockets are full, they add about two to four inches to your profile. You can wear your BDU’s, and that will add pockets to your legs and arms. If you chose to wear a uniform, I would recommend the Patagonia Jungle uniform. It is super light and dries fast. You can also add pouches onto your gear belt, or you can put one or two onto your rebreather straps. An old school M16 pouch is great for a spare mask or extra fin straps. You can cut the grenade pouches off of the sides to reduce the drag. Here are a few after-market pockets options that can help you streamline your profile without sacrificing your gear needs or altering your existing gear in any way.

SCUBAPRO HYBRID CARGO SHORTS form-fit to your body like you were born wearing a pair. On the underside of the nylon panels, a micro-plush interior makes the shorts warm and cozy. This fleece fabric absorbs less water, which keeps heat against the body, increasing overall warmth. They also dry quickly. They can be worn by themselves, over a wetsuit, or if you need a little more warmth, they are great for over dive skins in warm water. They are also useful for items that need to be at the ready or if you need to tuck something away while diving.


The SCUBAPRO Hydro’s Pro Cargo Thigh Pocket (full pocket with clips and straps) can provide the same storage as the Cargo shorts that capacity. Ideal for storing swimmer slates, lights, marker buoys, spare masks, compact cameras. Quick attachment via clips & thigh strap. The pocket has a large flap with a squeeze-style” side-release buckle closure. Bellow pocket design and large flap make access to stowed items easy and secure. The most significant feature is if you don’t need additional storage capacity, you can just remove the pocket for a more streamlined profile.

The SCUBAPRO Hydros Pro BCD Ninja Pocket is ideal for storing swimmer slates, lights, marker buoys, spare masks, compact cameras. Quick deploy when needed, roll-up when not. Pocket has a large flap with squeeze-style” side-release buckle closure. Bellow pocket design and large flap make access to stowed items easy and secure. All of the SCUBAPRO pockets are made from durable nylon fabric for strength and durability.

Another option is to glue pockets onto your wetsuit/ drysuit. This is way more permit, so make sure you get it right. You can do it yourself, but unless you have done things like this before, I would recommend having someone that has done it before showing you how to do it or have them do it. There are a lot of YouTube videos out there and articles about how to do this. There are pockets you can buy just for this purpose.

www.google.com

SCUBAPRO Sunday – Midway

Sunday, October 20th, 2019

The movie Midway is one of my favorite WW2 movies. They used a lot of real footage from the battle that was shot by director John Ford during the actual battle, (He also directed, They were Expendable, and Mister Roberts) you can tell it was old footage, but it does helps tell the story. So far Hollywood has not done a great job “remaking” movie or retelling the same story. They killed Red Dawn. Hopefully they use the same mindset that was used for Saving private Ryan, Band of Brothers and even Fury.

Gentex Awarded Contract for USSOCOM Coxswain Helmet System

Friday, October 11th, 2019

Carbondale, PA, October 11, 2019. Gentex Corporation, a global leader in personal protection and situational awareness solutions for defense forces, emergency responders, and industrial personnel announced today that its new Ops-Core® FAST SF Carbon Composite Helmet System has been chosen by the U.S. Special Operations Command (USSOCOM) to fulfill their contract for Special Operations Forces Personal Equipment Advanced Requirements (SPEAR) Family of Tactical Headborne Systems (FTHS) — Coxswain Helmet System. The five-year Indefinite Delivery Indefinite Quantity (IDIQ) Firm Fixed Price (FFP) production contract carries a maximum value of $95M.

Gentex Corporation has been supplying products to USSOCOM since its activation in 1987 and is focused on designing and delivering solutions driven by end user input. Just recently, the company was awarded contracts for the USSOCOM SPEAR FTHS Ballistic and Non-Ballistic Helmets, as well as the USSOCOM Communication Accessory Suite Land (CASL) program for it’s Ops-Core Adaptive Mission Platform (AMP™) Communication Headset.

“We’re extremely pleased to have been chosen to provide the Coxswain Helmet System for USSOCOM,” said Tom Short, vice president of Ground Systems, Gentex Corporation. “The FTHS Coxswain contract validates our design process and helmet system innovations while bringing the FTHS Ballistic/Non-Ballistic and FTHS Coxswain Helmets together as one family of headborne systems with interchangeable accessories, common parts and simplified logistics.”

The FTHS Coxswain Helmet System consists of the Ops-Core FAST FTHS Carbon Composite Helmet with modular Ops-Core accessories:  Step-In Visors with clear and tinted lenses, NVG Snap Shields, FAST Ballistic and Carbon Composite Mandibles, and FAST Low Profile Ballistic Appliques. Additionally, the helmets will come with a variety of Ops-Core VAS shroud options, helmet covers, ARCTM rails, pads, exterior Velcro and will be available in four sizes with various color/camouflage options.  The Ops-Core FAST FTHS Carbon Composite Helmet is available today and commercial versions of the Coxswain Helmet System accessories will be available later this year.

Part of Gentex Corporation’s portfolio of helmet systems for defense, emergency response, and security forces, the focus and dedication of the company’s Ops-Core brand remains the same – protecting elite forces.  The modular, scalable, open-architecture design of Ops-Core products allows for the seamless integration and true system level performance.

shop.gentexcorp.com/ops-core-fast-sf-carbon-composite-helmet

SCUBAPRO Sunday – Starting an Outboard Motor

Sunday, October 6th, 2019

Move the shift lever to NEUTRAL.

You MUST supply water to the engine before attempting to start it. Use mouse ears or have the lower unit in the water. Engine damage can occur quickly. Watch for Engine Overheating or No water Flushing.

Be sure the engine is in the normal operating position.

Open the vent screw on the fuel tank cap.

• Turn it clockwise to close.

• Turn it Counterclockwise to open.

Make sure the fuel line arrow is pointing towards the engine.

Squeeze fuel primer bulb, the outlet ends up, until firm.

All Models

If equipped, attach the clip and lanyard assembly to the emergency stop switch / STOP button. Snap the lanyard to secure a place on your clothing or life vest

1. Emergency stop switch / STOP button Move the shift lever to NEUTRAL.

NEUTRAL

Start-up (Cold Engine)

Pull the choke knob fully out. Twist the throttle grip to START position.

Start-up (Warm Engine)

Align the arrow mark on the throttle grip with the START position. Do not use the choke.

1. Choke knob

2. Throttle grip

3. Start position

4. While seated, grasp the starter handle and pull slowly until the starter engages, then pull hard. Allow the starter cord to rewind slowly.

5. If your engine doesn’t start after three pull, push the choke knob in and repeat the starting procedure.

After Engine Starts

1. Gradually, push the choke in after the engine is warm.

2. Check the water pump indicator. A steady stream of water indicates that the water pump is working. If a steady stream of water from the water pump indicator is not visible, stop the engine.

3. Twist the throttle grip to IDLE position or slower. Move the shift lever to NEUTRAL.

Outboard Won’t Start

It doesn’t matter what brand of outboard you are us most of all starting problems are caused by the same group of things and don’t require a mechanic. At most you should only need a screwdriver and a roll of riggers tape. However, if you jumped this motor in or if you just did a lockout and brought it up from a sub. There might be other things that are wrong that you will need tools for. You should always have tools and some spare parts on the boat.

Start by noticing essential clues as to the cause:

• Sometimes the motor will sound like it’s not even really trying to start; other times it’ll sound like it’s almost starting.

• Is there an external tank connected by a fuel hose? If so, is the arrow on the line pointed the right way?

• Do you smell gas?

• Does it start okay, then die when you put it into gear?

WHAT TO CHECK WHEN THE OUTBOARD DOESN’T SOUND LIKE IT WANTS TO START

Three (or four with an electric start) things to check when the motor doesn’t even sound like it wants to start, regardless of whether it has an internal or external tank:

Kill Switch. Make sure that the kill cord (aka “deadman”) is appropriately attached to the motor. Don’t just look at it — generally, if it’s even a tiny bit out of place, it will stop the engine — or prevent it from starting. Always try and have an extra on every boat. You never know when it might get lost.

Out of Gas? Check that there is gas in the tank.

Tank Switch. If your motor has both an in-motor gas tank and an external tank, there will be a switch to choose which tank the motor is using (it’s usually on the front of the motor). Make sure it is set to the correct one! It can easily get bumped to the wrong position when the motor is removed or when the motor is tilted up and down.

WHEN THE OUTBOARD ALMOST STARTS, THEN DOESN’T

Two things to check when the motor sounds like it’s almost starting:

Choke? Try to start it both with and without using the choke, regardless of what the standard starting procedure is.

Throttle? Try varying the throttle position a little. Sometimes giving it a little more or less gas will help.

OUTBOARD STARTING PROBLEMS WHEN USING AN EXTERNAL GAS TANK

If your outboard has an external gas tank, there can be a number of problems between it and the motor. Do a quick visual inspection from the tank to the motor and then run your hand up the fuel hose. Many times, the problem will be very apparent when you do this.

Tank Vent Open? If you are using an external tank, make sure the vent on it is open. If it is not, air cannot flow into the tank to replace the volume of gas that is being used. Eventually, there will be a vacuum, and the motor won’t be able to suck gas from the tank. If the vent is open, but the tank looks “sucked in,” the vent may be clogged (infrequent, but it can happen). Try cracking the gas cap to let air into the tank — if this works, you can probably get to where you are going with the cap cracked (unless the seas are bad then you will have to watch out to make sure water does not get in the tank. If you have anything waterproof, you can put it over the tank make sure that it can still get air) Try cleaning the vent.

Fuel Line Connected or pinched the fuel line can come just slightly disconnected at either the tank or motor end. Don’t just look at it; remove the fuel line, reconnect it, and then tug gently to make sure it’s fully clipped on at both ends. If you put your fuel at the front of the boat to help even out the weight, then make sure no one is stepping on it or if it is pinched. You might have to Moe the fuel closer to the back. Check that the fuel line isn’t kinked or under something that could partially block the flow.

Squeeze Bulb. Squeeze the bulb in the fuel hose to get fuel up to the motor. Squeeze until the bulb is firm, don’t try to force it as you’ll end up flooding the motor.

If you have just replaced the fuel hose or bulb, double-check that the arrow on the bulb points from the tank to the motor (it has one-way valves in it). If you squeeze and the bulb stays “squeezed” or is slow to regain its shape, check that the tank vent is open; if it is, you probably have a blockage in the hose, or it is kinked.

If you squeeze the bulb and it never gets hard or takes more than 5 or 6 squeezes to get hard, there is likely a crack/cut/nick in the fuel hose between the tank and the bulb which is pulling in air.

If you squeeze the bulb and smell gas, you almost certainly have a cracked, cut or nicked fuel hose between the bulb and the motor, or the fuel line is not securely connected to the motor.

Cracked, Cut Fuel Hose OR Loose Connections. If the leak is on the pressure side (between the bulb and the motor), you’ll usually be able to see where the fuel is leaking. If it’s before the bulb, you simply have to look and feel to find the imperfection. Also, note that it may be a hose clamp that has come loose, or it’s possible for the squeeze bulb to have a crack in it (sunlight rally is the enemy to anything rubber).

If it’s a loose connection and you have a screwdriver, you can tighten it. If it’s a crack or nick, a few wraps of tape will often hold the hose together enough to get back to the big boat.

Blocked Fuel Hose.

Pump the squeeze bulb a few times and see if there is good fuel flow with each squeeze.

If it seems like there is a blockage, the long-term solution is to replace the hose. As a get-home measure, keep your speed low (so as to need less fuel) and keep pumping the bulb to help force fuel through the blockage. This will work for a brief stint, but once the delamination starts, it quickly gets worse. Replace the hose ASAP!

HOW TO TELL IF THE OUTBOARD IS FLOODED

Flooded refers to flooding the motor with fuel, not having dropped it in the water.

If you try starting the motor and smell gas, the motor is likely flooded (yes, as noted above, the gas smell can come from a cracked fuel line, but that is not as likely). Do NOT use the squeeze bulb – it will just flood the motor!

You have two choices for a fix:

• Wait about 10 minutes and try starting again.

• Do not use the choke, open the throttle all the way, and try starting again — it will usually take at least 2 to 3 pulls. If it doesn’t start with a half dozen pulls, wait 10 minutes and try again.

Sometimes, after flooding, it will start and then die. If that happens, mainly if it was a cold start, you can now start it using your typical “cold start” procedure with choking it, etc.

OUTBOARD STARTS BUT DIES WHEN YOU PUT IT INTO GEAR

Starting then dying when you put the motor in gear is the classic symptom of having something caught around the propeller — usually, a line or something, if you are off the coast of California, then there is a good chance its kelp. Also, if you have the prop-protectors on then tend to get foaled a lot easier. Leave the motor off and tilt it up to check, remove the kill switch then remove whatever you find. After you are done put the kill switch back on.

CONCLUSION

If the motor won’t start, walk-thru your steps, is the kill switch in? Does it have fuel? Is it getting fuel? Is it getting air? Walk your way from the gas to the motor. Systematically think about what the problem is most likely to be and check those items first. Lastly, remember if you have jumped the motor in, then there are a lot more things to look for then what I have just talked about. I will save that for another Sunday.


SCUBAPRO Sunday – Cramps

Sunday, September 29th, 2019

When you are doing a long dive there is a good chance that you are going to get a cramp. Cramping can happen for several reasons. Being dehydrated, diving for a couple of weeks straight or even you haven’t dove in a while. Most of the time you try and straightening out your leg that has the cramp while only kicking with your good leg, you try and grab your fin and stretch it out while keeping up with your swim buddy. Cramping occurs in the calves, hamstring, quadriceps, thighs and the feet—mainly due to the finning action that causes muscle fatigue and triggers muscle spasm. But mostly in diving, you get a cramp in your upper and lower calf from pointing your toes while you are diving.

So, what can you do to stop this from happening?

• Replace old equipment if it doesn’t fit you properly, it can cause feet related cramps. So that favorite pair of fins you stole when you were in training should be retired, hang them on your wall in your garage.

• Check the foot pockets of your fins to make sure your feet are comfortable enough and that there is sufficient room for them to move a bit. So, make sure your fins fit all the boots/footwear you are going to use, you might use a large in the summer but in the winter when you are wearing thicker boots or a dry suit you might need bigger fins. That also goes for shoes, like Vans or LALO’s that you might wear when doing a dive where you will need to have shoes on for climbing or good traction. You might have a size 10 for summer and a 12 for winter, so you can add insulation.

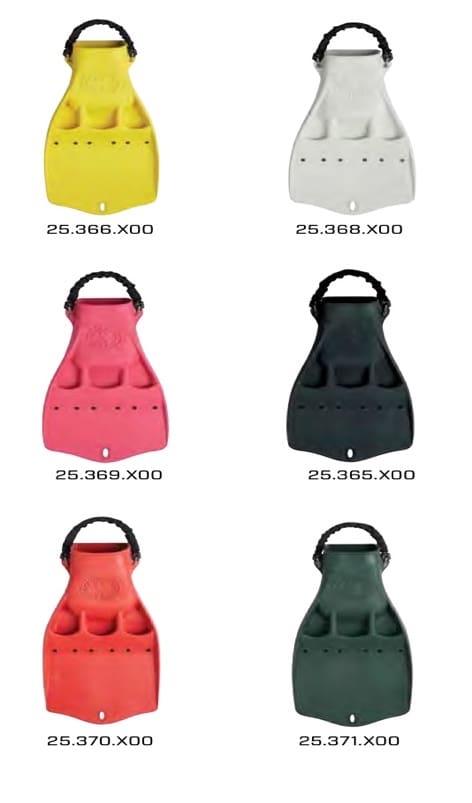
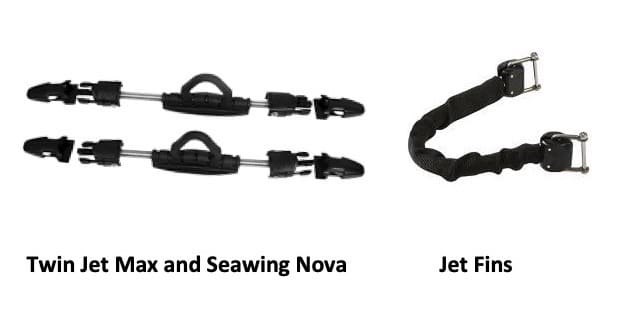
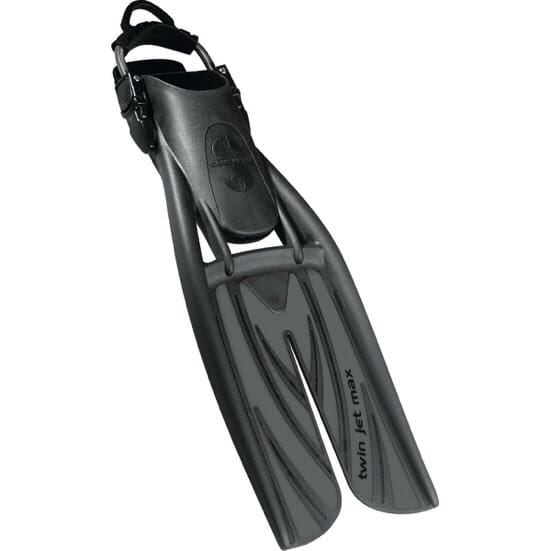
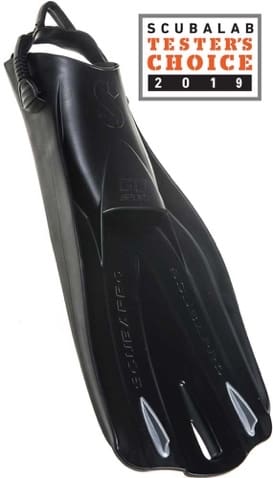
• Make sure you are using the right type of fin for the kick you use. Make sure the stiffness and surface area of your fins’ blades are what you need. Fins are designed for different types of kicks; Jet fins are great for a power kick or a frog kick, Seawing Nova’s are made to be great for propulsions with not as much effort as saying a jet fin. Also, look at the stiffness. There are two types of Seawing Nova. The Seawing Nova and the Seawing Nova Gorillas. The Gorillas are a stiffer fin, and they are great for a working diver or someone in good shape. So, pick the right one for the job you are doing and the environment you will be in.


• Your footwear should not be too tight as this will restrict circulation and bone movement in your foot. If you are diving in the winter and you add a dive sock to your booties to keep you warm, what you are doing is restricting your circulation, and that will make you cold and cause cramps. If you want to add layers have different sizes booties.

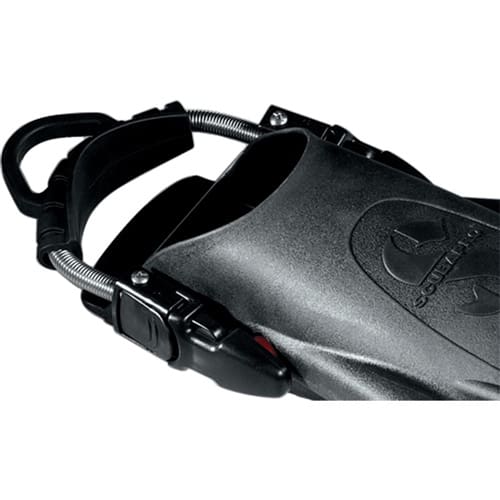
• The strap should not bite into the back of your heels too tightly, pushing on your Achilles tendon. This can happen if your footwear is too big and you are shoving your foot in and barely getting your strap around you heal or you are afraid you will lose your fin, so you pull the strap really tight. Something that could help with this is a self- adjusting fin, like a bungee strap or a steel spring. This will help keep the right pressure on your heel.  


Cramping generally affects people that have taken a long break from finning. I say finning and not diving because you don’t have to dive to fin. So, like all of your other skills, shooting, moving, and communicating. You need to practice finning, so you stay in finning shape. You should try and swim a couple of times a week and do it with fins on. When you are at the gym, don’t just do arms. Do functional workouts that include a lot of exercises for your calves and strengthening the specific muscle groups that cramp when diving. Also try and include foot flexing exercises, as one of the other reasons for cramping is your feet are not used to being pointed for long periods of time, as I mentioned above. I know a lot of groups are getting back into the water but are still living in the desert. So, when you have the chance try and get back into the water or into the gym.  

SPARTANAT: First Time in Action for the TILO-6MA at the Outer-Limits Experience Week in Austria

Tuesday, September 24th, 2019

The TILO is still the smallest thermal imaging goggle in the world with a 640 pixel sensor. It has been used since one year in various special units worldwide. Also with the US authorities it enjoys increasing popularity and was procured. The new metal version of the TILO-6M is now equipped with an aluminium housing and is waterproof up to 20m and therefore also suitable for divers. During the Experience Week at the Grundlsee in Austria, enthusiastic interested parties were able to convince themselves of the possibilities of these smallest thermal imaging goggles to date. A German SEK (SWAT team) took the opportunity and tested the TILO.

The TILO can be fastened as shown with a very light helmet holder. For use with a diving mask a special spacer is used, so that the distance is sufficiently large. Alternatively an attachment to the Opscore Shroud is possible for this there is also an adapter available.

The Aluverion of the TILO-6M is also much more suitable than the plastic version for use as an thermal clip on. With its bayonet connection it can be mounted in front of a rifle scope within seconds.

In combination with the afocal attachment lens it can reach a detection range (standing man) of 2,5km.

Here, you can find the SPARTANAT report from outer-limits Experience Week 2019.

ANDRES INDUSTRIES on the Internet: www.andres-industries-shop.de

SPARTANAT: www.spartanat.com

SCUBAPRO Sunday – Viking Funerals

Sunday, September 22nd, 2019

Like most military people, I believe in Valhalla. I have seen the 13th warrior and have always hoped to be in Valhalla when I die. The Vikings believed in an afterlife, and these were based on the religious beliefs they held. We have been learned about their practices by both archaeological and textual sources. The Vikings believed that it was possible to take their worldly possessions into the afterlife with them. So, an essential feature of Viking funerals was the grave goods. The Vikings believed that warriors who fell in battle would earn the right to enter Valhalla, an enormous hall located in Asgard, the domain of Odin. There, the fallen warriors would feast and fight until the arrival of Ragnarok. The dead needed to have their equipped so they could fight in the afterlife. There was more than one realm for the dead include Folkvangr (also for warriors), Helgafjell (for those who have led good lives), and Helheim (for those who died dishonorable deaths). This could be from laziness, old age, for example, to die in your bed with never doing anything good for your people. In Viking times, dying bravely was definitely the most honorable.  

One of the most essential objects required by a dead Norse was a warship. The Vikings were great seafarers, and they believed that ships would help provide them with safe passage into the afterlife. Although the warship played a prominent role in Viking funerals, there was no standard funeral., it was based on your status. The grave could also include slaves or thralls, and, in some cases, the widow would choose to be sacrificed to join her husband on the journey to Valhalla. It the Middle Ages a traveler named Ahmad ibn Fadlan gave the account of a funeral like no other. At the funeral for a Viking chieftain, he said it included a sacrificial female slave who was forced to drink copious amounts of alcohol, then she was raped by every man in the village as a tribute to the deceased. From there, she was strangled with a rope, stabbed by a matriarch of the village (known as the Angel of Death), then placed in the boat with her master and set on fire. The more polite Viking would bury people with stuff they had in life like a craftsman might be buried with his tools. A Viking woman might find her cloth-making equipment or cooking tools would follow her in the afterlife.  

Vikings Traveled to the Afterlife by Ship but Not by Sea

Thru out Scandinavia, Archaeology has discovered some Viking burial mounds that were meant to resemble ships. They used stones to outline the shape of what looks like small ships. Higher ranking Vikings, such as chiefs and kings, were even able to have actual ships accompany them into the afterlife. In some cases, the boats would be buried with its contents, while in others, they would be burnt before the burial. There is a widespread belief today that the Viking set the ships on fire before pushed out to sea, but I am sorry to say this, but there is no real proof that this has ever happened. So, no flaming arrows. Sorry

Apart from their ships, warriors entering Valhalla would be required to bring their weapons and armor, these objects were part of a Viking’s grave goods. Archaeologists have found blades as part of a Viking’s grave goods would usually be broken or bent. This was meant to symbolically signify the final death of the individual, as the Vikings believed that a warrior’s soul was linked to his weapon. Additionally, the destruction of the blade served as a deterrent to grave robbers. 

Grave goods also served to ensure that the deceased was satisfied in the afterlife. The Vikings believed that if the dead were not appeased, they could return as a Draugr (unfriendly ghost) to haunt the living. The undead could be blamed for everything that was going bad, from losing a battle or the crops not growing. If they thought a Draugr was up to no good, they would dig up the last people buried and look for signs of undead activity. When a Draugr was identified, the Vikings would rebury the body with more grave goods, assuming at the person had been a highly respected person in life. Sometimes they would go as far as to stake the body down to make sure it couldn’t get up again and lastly, they would chop off their head so as to kill it, very much like Dracula or the walking dead.  

When you died, there were two typical ways of dispose of the body, cremation or inhumation (cover you with a rock mound basically) (the ground was frozen most of the time, so the inhumation was the best way for them to bury someone)

There are typically two common ways to bury the dead, and the Vikings did practice both. The first method, cremation, is to burn the body, the ashes, could then be scattered, buried, or sailed out to sea. The second, inhumation was to bury the body in its current state under the ground, and then either place earth, dirt or stones on top of the body.

It was normal in Norse times to cremate the deceased body before a land or sea burial, a practice that had a significant reach to their afterlife. By cremating their dead, the Vikings believed the smoke would carry them to their rightful destination in the afterlife. Successful cremation required a scorching fire, hot enough to burn flesh and bone to ash and to achieve this a pyre was needed. The Vikings used pyres (basically a big pile of very dry wood that would burn at very high heat) (you know like the fire Luke used to cremate Darth Vader” his father”) to cremate their dead. Without the intense heat caused by a pyre, a typical fire would likely not burn the body completely. This could leave parts of the body remaining and is of course, not desirable.

A Viking sea burial.

Another kind of burial was for the Vikings to sail their dead out to sea. This practice often involves the burning of the ship before the dead are cast out. Many believe that the body was cremated before the ship was sailed. Either way, it was common for the dead’s goods to travel with them out into the water. This type of burial was not common however and was likely reserved for sea captains, noble Vikings and the very wealthy. In old Norse times, boats would have taken months to construct and would not have been wasted without valid cause or a suitable amount of status. Some woman held high statues also. One of the most extravagant boat burials honored two women, who likely died around 834 A.D. Known as the “Oseberg ship,” it’s one of the most well persevered Viking artifacts ever found. While the Vikings were known for the craftsmanship that went into their vessels in general, the size and detail of the Oseberg were above and beyond. Seventy feet long and nearly 17 feet wide, the ship had 15 oars on each side, a pine mast more than 30 feet high, and was spacious enough to fit 30 people. You go girls.

Typically, the Vikings would wait for seven days before the celebration. This day would be marked with the drinking of ale, which signified the passing of any property from the deceased. After this celebration, the heir would truly claim their inheritance. The exact rituals of Viking funerals are challenging to say, (so maybe flaming arrows) as they kept minimal written accounts of their lives and deaths. Regardless of how the body was disposed of, a few rituals remained almost constant. The body was draped in new clothes explicitly prepared for the funeral, and a ceremony was held featuring songs, chants, food, and alcohol. Death rituals are designed to help those left behind come to terms with the loss. Many have survived but slightly modified over the centuries. Looking at what we do today when someone dies today. It is very close to the Viking funnerals. We put them in their uniform, sometimes we give them things for the afterlife, swords, tomahawks, alcohol and we drape them in cloth, but it is our flag, the symbol of our tribe and nation. I would never compare us to the Vikings, as they had no rules and did what they wanted to do. But a lot of the warrior spirit of them is in every person that goes to fight and defend their brothers.

MDM 19 – Arbor Arms x Aqualung Buoyancy Compensator Shooter Kit Combination

Tuesday, September 17th, 2019

Arbor Arms is working with Aqualung to offer a low cost retrofit kit for armor carriers so that they can be used in conjunction with Aqualung Buoyancy Compensators. In this case, we see the Calypso.

The cummerbund is elastic so it will allow a buoyancy compensator or horse collar to still inflate yet keep your gear nice and snug.

Additionally, the Aqualung weight belt is worn with ditchable weights fore and aft to keep them out of the way of holsters and magazine carriers.

arborarmsusa.com