A dive knife is an indispensable tool. Offered in a variety of styles and sizes, corrosion-resistant metals and featuring a choice of cutting edges to handle different cutting tasks, a diving knife is a must-have item. A good dive knife is a must-have when you go thru underwater knife fighting school.
Dive Knife Sizes
Dive knives range from the traditional full-sized knife’s that you generally strap to your lower leg, to compact ones that can be mounted on a BCD pocket or secured to an HP hose.
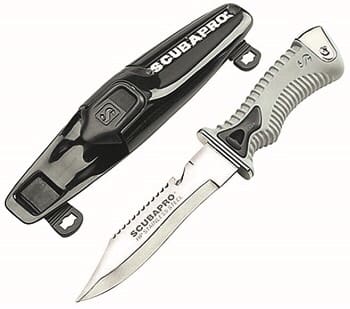
The K6 is an excellent example of a traditional-style full-sized all-purpose diver’s knife. Its large six-inch blade and ergonomic grip handle comes with an injected molded sheath and two quick-adjusting buckle straps that mount easily on the lower leg.
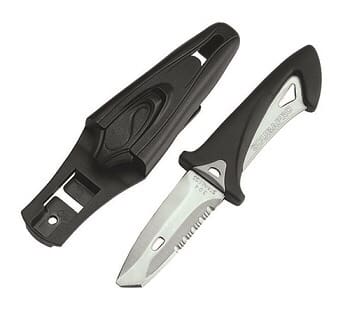
At the other end of the spectrum is a diver knife like the White Tip. With a blade length of about 2.5 inches and an overall length of just under six inches, this type of knife is compact enough to attach to a hose or a BCD as a primary knife or to stow in an easy-to-reach pocket as a back-up cutting tool.
Diving Knife Materials
Stainless Steel Diving Knives
Stainless steel is the most common alloy used in the manufacturing of dive knife blades. The majority of dive knives are made of either Grade 304 stainless steel or Marine Grade 316 stainless steel.
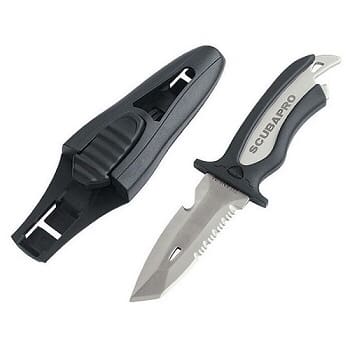
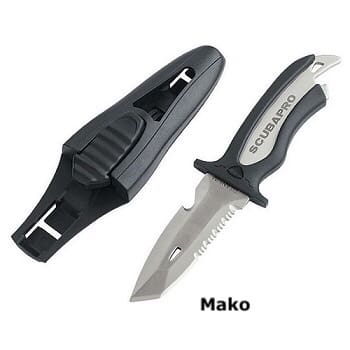
Grade 304 hard-tempered stainless steel is a very versatile metal that is used in a variety of outdoor applications. It offers resistance to surface oxidation and provides an excellent cutting edge. Because it is a little softer than Marine-Grade 316 stainless steel, a Grade 304 blade needs to be sharpened more frequently to maintain its right cutting edge. The stainless steel version of the Mako is an excellent example of a diving knife made with Grade 304 stainless steel. Marine Grade 316 stainless steel is similar to Grade 304, but it has one crucial extra ingredient: molybdenum. This is a hard, silver-white metallic element used to toughen the steel. This enables Marine Grade 316 dive knives to maintain their super-sharp edges for longer periods, plus it increases corrosion-resistance. SCUBAPRO’s premier dive knife, the TK 15, offers a six-inch Marine Grade 316 stainless steel blade. The blade surface is polished explicitly so that water can drain quickly to prevent oxidation further. Also, the thickness of the knife’s stainless steel is consistent from one end to the other, creating a high level of stiffness and strength.
Titanium Diving Knives
Another popular material for dive knife blades is hardened titanium. A titanium dive knife blade is entirely corrosion-resistant, it is lightweight yet extremely strong, and it can hold a sharp edge for a long, long time, all of which make titanium dive knives excellent cutting tools for use in saltwater environments. The lightweight, multi-function X-Cut titanium dive knife is an excellent example of a titanium cutting tool. Measuring just over five inches in overall length, its 2.5-inch blade is specially designed to maintain a highly-durable cutting edge for a long life of corrosion-free performance.
Diver’s Knife Cutting Edges, Tips and More
Dive knife blades come with either a plain edge, a serrated edge or a combination of both to handle a variety of cutting jobs.
A plain edge is good for making clean slicing cuts, or when using more of a pushing motion when control and accuracy are required – like filleting a fish. This type of cutting motion is especially useful if the cutting edge is curved. Plain edges are also easy to maintain. Anyone with a basic sharpening tool can keep a plain edge razor sharp with little effort.
A serrated edge has a series of mini-edges or teeth similar to a hand saw. A serrated edge is excellent for sawing-type cuts through heavy materials like wood or rope or stubborn kelp fronds. For example, using a plain edge it would take forever to cut through a three-quarter inch anchor line, but a serrated edge would make quick work of it as the teeth bite deep into the material with every sawing motion. A serrated edge also stays sharp for much longer than a plain edge, but it is a bit more difficult to sharpen.
Because these different blade edges excel in cutting different types of materials, most dive knives offer both, often on the same cutting plane. Normally, the plain edge can be found closer to the tip of the blade, beneath the curve or “belly” of the blade, whereas the serrated portion can be found closer to the handle for better leverage when leaning into the tougher cuts.
Since a scuba diver’s knife blade’s cutting efficiency increases in relation to its length, dive knives that sport long blades, like the TK15 and K6, separate their cutting edges, devoting the entire top length of the blade to serration, and the entire bottom length to the plain edge. This maximizes the length of each cutting edge and the overall efficiency of the knife.
When it comes to blade tips, dive knives normally come with either a blunt tip, a tanto tip, or some variation of a pointed tip.
On one end of the spectrum is the blunt tip. As its name implies, the blunt tip is flat and dulled. It is designed to be more of a prying tip than a piercing tip. It is considered safer than other tips because you can’t accidentally stab your leg or puncture your BCD when returning it to its sheath.
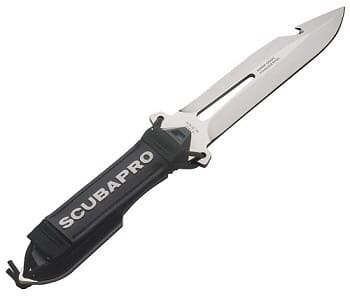
On the other end of the spectrum is the pointed tip. These tips come in a variety of shapes. For example, the TK15 comes with a drop-point tip. This is where the blade’s upper edge, or spine, gradually “drops” as it reaches the tip of the blade to form the tip. This is considered a strong tip that is easy to control when cutting or piercing.
The K6 and X-Cut have clip-point tips, so-named because the spine of the blade is “clipped” as it approaches the tip. This creates a narrow tip that can be very useful for piercing a line wrapped tightly around a boat propeller in preparation for a slicing or sawing cut. While not quite as strong as the drop-point, the clip-point is considered a very sharp and controllable point.
Falling in between the blunt tip and pointed tip is the tanto tip. Combining elements of blunt and pointed, the typical tanto tip offers more of an angled tip which is sharpened for cutting, like on the Mako. However, sometimes the tanto tip provides a small blunt spot as well as you’ll find on the White Tip. Both versions produce a very strong and durable tip, enabling you to do a little prying with less chance of snapping the tip, with the added ability do some cutting when working in tight spaces.
Most dive knife blades also include a notch for cutting fishing line and, depending on design, and you can sometimes find additional tools like a bottle opener (Mako), a stainless steel handle-end for hammering (K6) or a shackle key (TK15).
Unique Cutting Tools You Won’t Want to Overlook
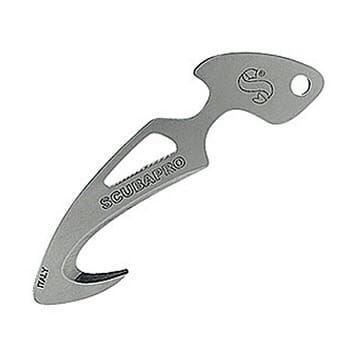
Not all scuba cutting tools look like a dive knife. Take, for example, the innovative stainless steel Mesh Cutter. While traditional dive knives are most effective when used with a pushing motion, the Mesh Cutter is designed to be used with a pulling motion. This is a safer motion, plus it provides great leverage and lots of cutting power with minimal effort. The ultra-sharp hooked blade is ideally shaped for slicing through line and netting.
What’s the Best Dive Knive?
Like with most types of dive equipment, the ideal knife depends on your individual diving style, and how you like to carry your gear. The choices are many. The good news is that with the variety of dive knives available in different sizes, shapes, materials and mounting options, finding the best dive knife to suit your unique diving needs shouldn’t be too difficult.